Time-Lapse Photography Tutorial: From Setup to Final Video
Learn how to create stunning time-lapse videos with the right intervalometer setup, camera settings, post-processing workflow, and gear.
This time-lapse photography tutorial walks you through every step of creating professional-quality time-lapse videos, from choosing the right interval to assembling the final clip. Time-lapse photography compresses minutes, hours, or even days into seconds of video. Clouds race across the sky, flowers bloom in moments, cities pulse with traffic, and stars wheel overhead. It is one of the most visually compelling techniques in photography, and it is more accessible than you might think.
This tutorial covers everything from gear and settings to shooting and post-processing a complete time-lapse sequence.
Essential Gear
Camera
Any camera that allows manual exposure control works for time-lapse. If you plan to assemble your sequences into polished video projects, our roundup of the best cameras for video content creation highlights bodies with built-in intervalometers and strong video codecs. Mirrorless cameras have an advantage because there is no mirror mechanism to wear out over thousands of actuations. Many modern cameras also have built-in intervalometer functions, eliminating the need for an external device.
Intervalometer
An intervalometer is a device (or built-in function) that triggers your camera at set intervals. You program it to take one photo every X seconds, and it fires automatically for as long as you need.
Built-in intervalometers are found on most Nikon, Canon, Sony, and Fujifilm cameras released in the last five years. Check your camera’s shooting menu for “interval timer shooting” or “time-lapse.”
External intervalometers connect via the camera’s remote port. They cost between $15 and $50 and offer more advanced features like ramping intervals. Brands like Pixel and Neewer make reliable affordable options.
Smartphone apps can control some cameras via WiFi and act as intervalometers. This works but can be unreliable over long sequences due to connection drops.
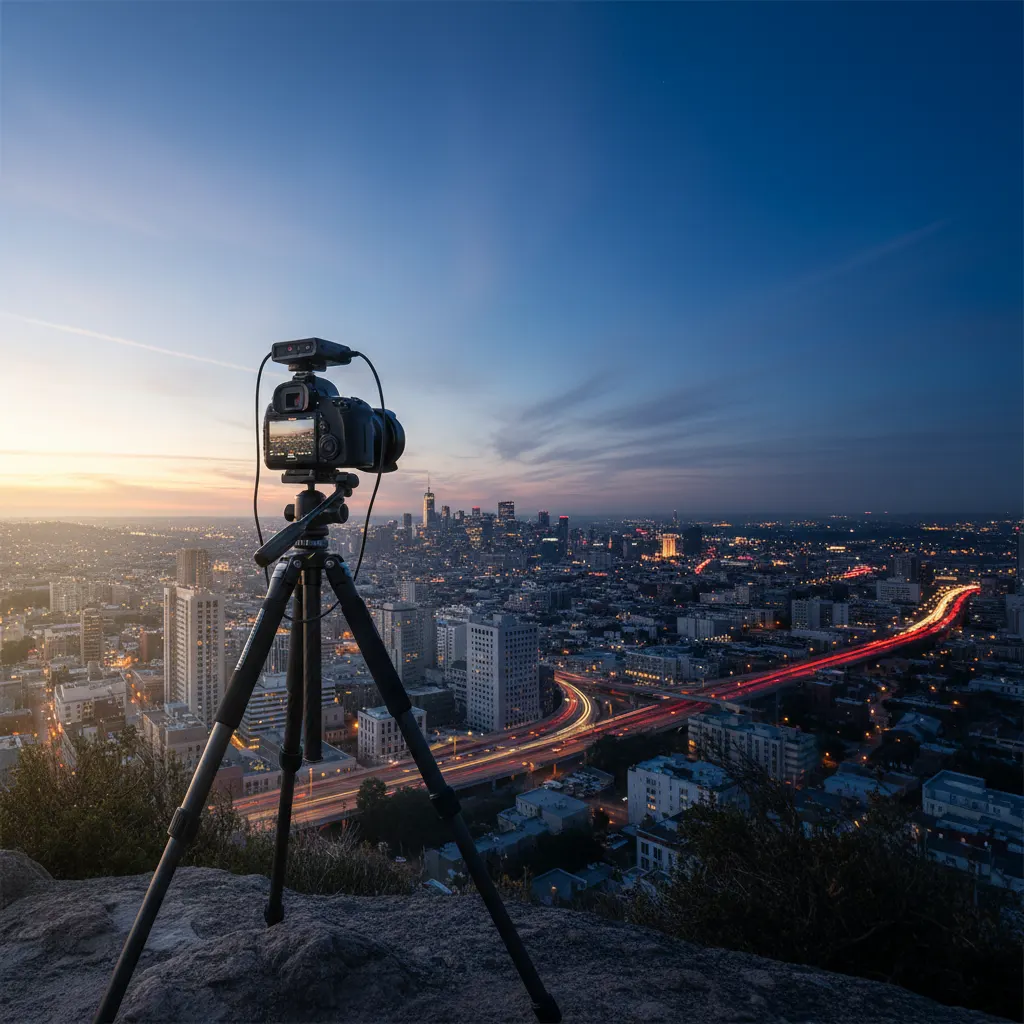
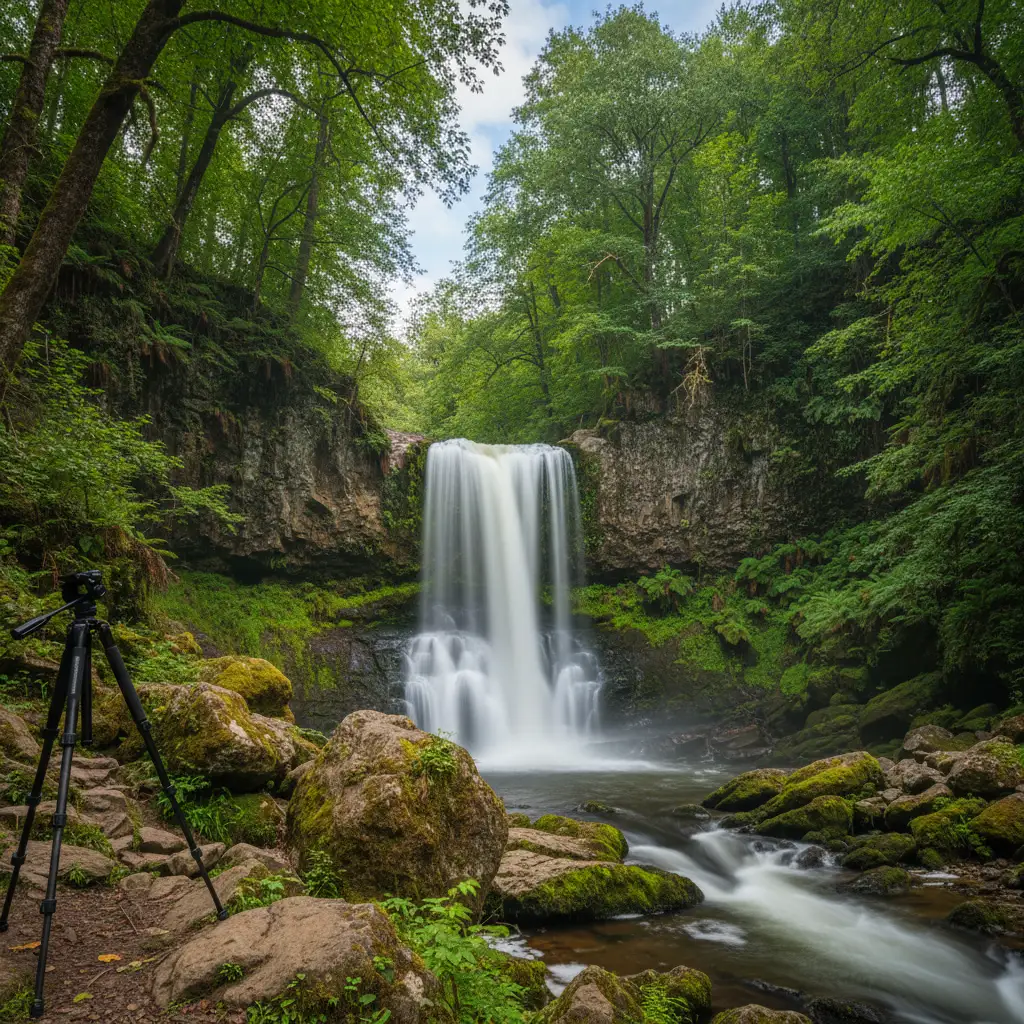
Tripod
A sturdy tripod is non-negotiable — see our roundup of the best tripods for photography for options at every price point. Any movement between frames creates unwanted jitter in the final video. Use a heavy-duty tripod and weigh it down in windy conditions. Do not extend the center column if you can avoid it.
Memory Cards and Battery
Time-lapse sequences eat storage and battery. A 500-frame sequence of 25-megapixel RAW files requires roughly 12 to 15 GB. Bring large, fast memory cards — our guide to the best SD cards for cameras covers the speed ratings and capacities you need — and a fully charged battery. For sequences lasting more than an hour, consider an external battery grip or AC adapter.
Planning Your Time-Lapse
Choosing a Subject
The best time-lapse subjects involve visible movement or change over time:
- Clouds: Moving clouds are the classic time-lapse subject. Works in almost any location.
- Sunsets and sunrises: Dramatic color changes compressed into seconds.
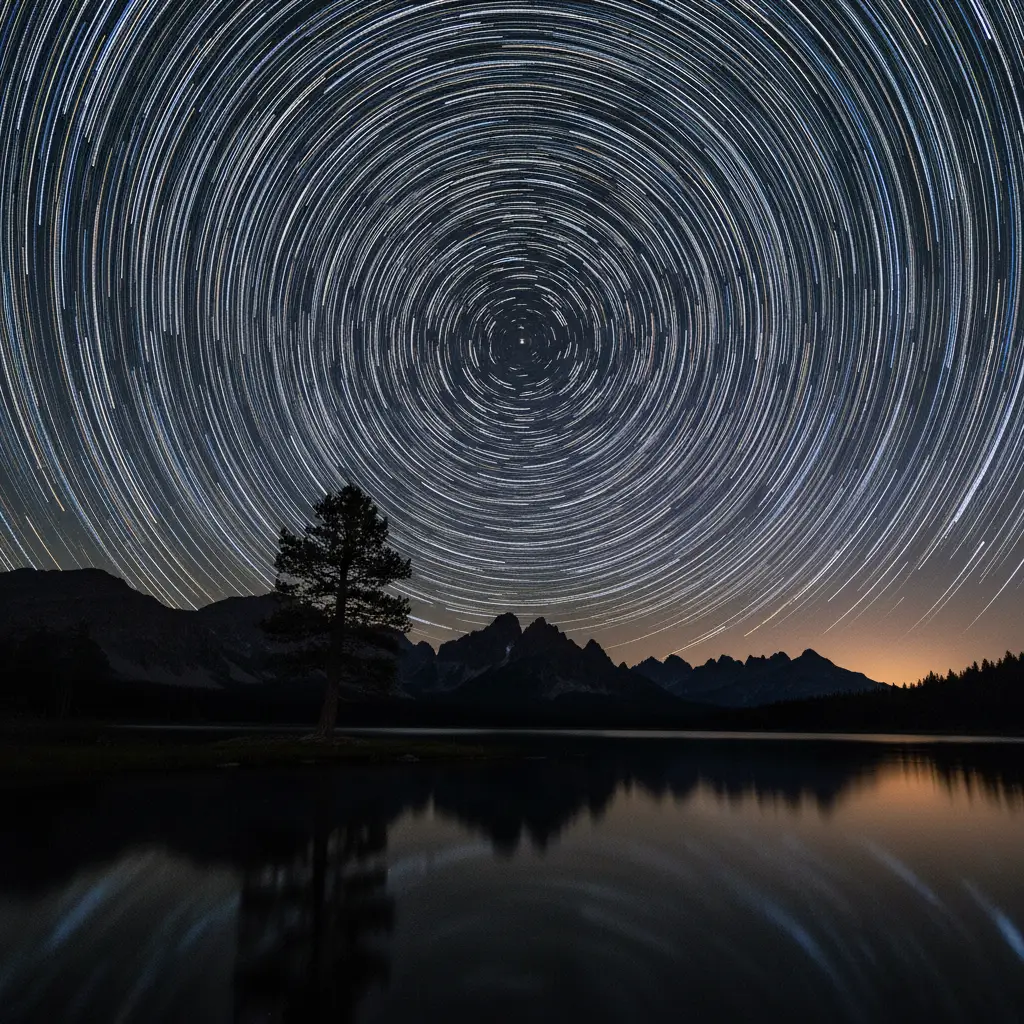
- Star movement: Requires dark skies and long sequences (2+ hours). Our guide on how to photograph the night sky covers the exposure fundamentals you will need for star time-lapses.
- City traffic: Light trails and flowing vehicles create mesmerizing patterns.
- Flowers blooming: Requires a very long time-lapse (hours to days) in a controlled indoor setting.
- Construction or projects: Document progress over weeks or months.
- Tides: Water advancing and retreating on a beach.
Interval Timing
The interval between shots determines how fast the final video plays. Here are recommended starting points:
| Subject | Interval | Shots for 10s of video (24fps) |
|---|---|---|
| Fast clouds | 2-3 seconds | 240 shots |
| Slow clouds | 5-10 seconds | 240 shots |
| Sunset/sunrise | 5-10 seconds | 240 shots |
| Stars | 20-30 seconds | 240 shots |
| City traffic | 3-5 seconds | 240 shots |
| Flowers blooming | 1-5 minutes | 240 shots |
| Construction | 1 per hour/day | varies |
For a 10-second clip at 24 frames per second, you need 240 images. At a 5-second interval, that takes 20 minutes of shooting. Plan your sequence length accordingly.
Camera Settings
Shoot in Manual Mode
This is critical. If you use any automatic mode, the camera will adjust settings between frames, causing visible brightness flickering in the final video. Lock down every setting manually. If you are not comfortable shooting in manual yet, our guide on how to use manual mode on your camera will get you up to speed.
Aperture
Choose your aperture based on the desired depth of field, typically f/8 to f/11 for landscapes. Do not change the aperture during the sequence.
Shutter Speed
Your shutter speed should be roughly half the interval for natural-looking motion blur. If your interval is 4 seconds, use a 2-second shutter speed. This creates smooth motion in moving elements like clouds and water.
If you are shooting in bright daylight with long intervals, you may need a neutral density (ND) filter to slow the shutter speed enough. The same ND filter techniques used in long exposure photography apply here. A 6-stop ND filter turns a 1/250s exposure into a 1/4s exposure, adding that desirable motion blur.
For star time-lapses, use the 500 rule: divide 500 by your focal length to get the maximum shutter speed before stars start trailing. At 24mm, that is about 20 seconds.
ISO
Keep ISO as low as possible for daytime sequences (ISO 100). For star time-lapses, you will need ISO 1600 to 6400 depending on your lens and ambient light.
White Balance
Set a manual Kelvin value. Do not use auto white balance. AWB shifts between frames cause color flickering that is difficult to fix in post.
Focus
Autofocus must be turned off. Set focus manually before starting the sequence. If your subject is a landscape, focus at the hyperfocal distance or on a point one-third into the scene. Use live view magnification to nail focus precisely, then switch the lens to manual focus so it cannot shift.
Image Format
Shoot RAW for maximum editing flexibility. If storage is limited, high-quality JPEG works but limits your ability to correct exposure or white balance variations in post.
Shooting the Sequence
- Set up your tripod on stable ground. Press it down firmly and check that it does not shift.
- Compose your shot. Use a wide-angle lens for expansive scenes. Leave room for moving elements.
- Set all manual settings: aperture, shutter speed, ISO, white balance, manual focus.
- Disable image stabilization. On a tripod, IS/VR can cause micro-shifts between frames.
- Disable auto screen off. Some cameras turn off the LCD between shots, which can cause subtle vibrations from the screen mechanism.
- Start the intervalometer. Take a test shot first to confirm exposure and composition.
- Walk away. Do not touch the camera during the sequence. Even checking the LCD can introduce vibration.
Dealing with Changing Light
Sunset and sunrise time-lapses present a challenge: the light changes dramatically during the sequence. If you lock exposure for the bright phase, the dark phase will be underexposed, and vice versa.
Solutions
Aperture priority with manual ISO and WB: This lets the camera adjust shutter speed for changing light while keeping other settings constant. It introduces some flicker but less than full auto.
Bulb ramping: Advanced intervalometers and some cameras can gradually change exposure over the sequence. This is the professional approach for holy grail time-lapses (day-to-night transitions).
Fix in post: Software like LRTimelapse can smooth out exposure variations across a sequence, removing flicker. Knowing how to read a histogram helps you spot clipping before it becomes a problem across hundreds of frames. This is the most practical solution for most photographers.
Post-Processing Workflow
Step 1: Import and Edit One Frame
Import all frames into Lightroom or a similar RAW processor. Edit one representative frame for exposure, white balance, contrast, and color. Then sync those settings to all frames in the sequence.
Step 2: Deflicker (If Needed)
If you see brightness variations between frames, use LRTimelapse (the industry standard) to analyze and smooth the exposure curve across the sequence. This step is essential for holy grail sequences.
Step 3: Export as JPEG Sequence
Export all frames as full-resolution JPEGs into a dedicated folder. Use sequential numbering in the filename (frame_0001.jpg, frame_0002.jpg, etc.).
Step 4: Assemble the Video
Import the JPEG sequence into video software:
- Adobe Premiere Pro: File > Import, select the first image, check “Image Sequence.”
- DaVinci Resolve: Import the folder; it auto-detects image sequences.
- ffmpeg (free, command line): A single command converts the sequence to video.
Set your timeline to 24 or 30 fps. Add music, titles, and transitions if desired. Export as H.264 or H.265 at your desired resolution (1080p or 4K).
Recommended Camera Settings Table
Here is a quick-reference table for common time-lapse scenarios with specific settings:
| Scenario | Aperture | Shutter Speed | ISO | Interval | ND Filter |
|---|---|---|---|---|---|
| Daytime clouds | f/8 | 1/2s to 2s | 100 | 3-5 seconds | 6-stop ND |
| Sunset/sunrise | f/8 | Varies (ramp) | 100-400 | 5-8 seconds | None or 3-stop |
| Star trails | f/2.8 | 20-25 seconds | 3200-6400 | 25 seconds | None |
| City traffic (day) | f/11 | 1/2s | 100 | 3-4 seconds | 6-stop ND |
| City traffic (night) | f/8 | 2-4 seconds | 400 | 5 seconds | None |
| Flower blooming (indoor) | f/5.6 | 1/60s | 400 | 2-5 minutes | None |
| Milky Way movement | f/1.4 to f/2.8 | 15-20 seconds | 6400 | 22-25 seconds | None |
For star time-lapse work, fast wide-angle lenses are essential. The Sigma 14mm f/1.8 DG HSM Art, Nikon Z 20mm f/1.8 S, and Sony FE 20mm f/1.8 G are popular choices among astrophotography time-lapse shooters. Their wide apertures gather enough light to keep ISO manageable while maintaining sharp star points across the frame.
Real-World Tips from Experienced Photographers
Always do a test run of at least 20 frames. Before committing to a full sequence, shoot 20 frames and scrub through them on the camera’s LCD. This reveals issues like auto settings creeping in, slight tripod movement, or an interval that does not match the subject speed. Fixing these problems after 20 frames is easy; discovering them after 400 frames is painful.
Tape your focus ring. After manually focusing your lens, place a small strip of gaffer tape across the focus ring to prevent accidental bumps from shifting your focus point. This is standard practice among professional time-lapse photographers, especially during multi-hour sequences where you might accidentally brush the lens.
Turn off long exposure noise reduction. Many cameras apply dark-frame subtraction noise reduction after long exposures, which takes as long as the exposure itself. A 20-second exposure followed by 20 seconds of noise reduction means your minimum interval becomes 40 seconds. Disable this in your camera’s menu and handle noise reduction in post-processing instead.
Use an AC adapter for sequences over 2 hours. Camera batteries typically last 300 to 500 shots in time-lapse mode. For a sunset-to-stars holy grail sequence lasting 3 to 4 hours at a 5-second interval, you need over 2,000 frames. An AC adapter or a high-capacity USB-C power bank (like those from Anker or Nitecore) connected to cameras with USB charging capability (Sony A7 IV, Canon R6 Mark II, Nikon Z6 III) ensures you never run out of power mid-sequence.
Consider a motion controller for advanced sequences. Motorized sliders like the Edelkrone SliderONE or Rhino Slider add subtle camera movement during the time-lapse. A slow pan or slide across the scene adds a cinematic quality that static time-lapses lack. These devices move the camera in tiny increments between each frame, creating smooth motion when played back at video speed.
Common Mistakes
Camera moved during sequence. Even bumping the tripod once ruins the clip. Secure everything and keep your distance.
Battery died mid-sequence. Always start with a full charge and know your camera’s shot count per charge.
Auto settings left on. AWB, auto ISO, or autofocus can shift between frames, causing flicker or focus hunting.
Interval too long for the subject. Fast-moving clouds at 30-second intervals look jerky rather than smooth. Match your interval to the speed of the subject.
Not enough frames. A 5-second clip feels abrupt. Aim for at least 10 to 15 seconds of final video (240 to 360 frames at 24fps).
Time-lapse photography requires patience during the shoot but delivers results that still images simply cannot match. Start with a simple cloud sequence using your camera’s built-in intervalometer, and you will be hooked.
Frequently Asked Questions
What interval should I use for a time-lapse? The interval depends on how fast your subject is moving. For fast-moving clouds, use 2 to 3 seconds between frames. For slow clouds or sunsets, 5 to 10 seconds works well. For star movement, use 20 to 30 seconds (matching your shutter speed). For very slow subjects like flowers blooming, intervals of 1 to 5 minutes are typical. As a general rule, faster-moving subjects need shorter intervals to produce smooth playback. At 24 frames per second, 240 frames produce a 10-second clip, so multiply the interval by 240 to calculate total shooting time.
Can I shoot a time-lapse with my phone? Yes, most modern smartphones have a built-in time-lapse mode that handles interval timing and video assembly automatically. iPhones and recent Android flagships produce surprisingly good results for casual time-lapses. However, dedicated cameras offer significant advantages: manual exposure control prevents flicker, RAW capture allows post-processing flexibility, and interchangeable lenses give you creative options from ultra-wide to telephoto. For serious time-lapse work, a mirrorless camera with a built-in intervalometer (like the Nikon Z6 III, Sony A7 IV, or Canon R6 Mark II) is the standard tool.
How do I avoid flicker in my time-lapse? Flicker is caused by slight exposure variations between frames. The primary prevention is shooting in full manual mode: set aperture, shutter speed, ISO, and white balance manually so nothing changes between frames. If you must shoot through a lighting transition (sunset, for example), use aperture priority with manual ISO and fix the flicker in post using LRTimelapse software. Another subtle cause of flicker is the mechanical aperture in the lens — even in manual mode, the aperture blades open and close slightly differently each shot. Using an older manual-focus lens with a manual aperture ring, or setting your lens to its widest aperture, eliminates this source of flicker entirely.
You might also like
How to Photograph Reflections Creatively
Discover techniques for capturing stunning reflections in water, glass, and puddles, plus how polarizing filters give you creative control.
Mastering Golden Hour Photography
Learn how to make the most of golden hour light for portraits and landscapes with practical camera settings and composition tips.
How to Shoot Long Exposure Photography
Learn long exposure photography techniques, essential equipment, camera settings, and creative ideas to capture stunning motion blur images.