How to Shoot Silhouettes: A Step-by-Step Guide
Master silhouette photography with backlighting techniques, exposure metering tips, subject selection, and creative composition ideas.
Learning how to shoot silhouettes is one of the most rewarding techniques in photography because the results are immediately dramatic with minimal gear. Silhouette photography strips a subject down to its purest form: shape. Without color, texture, or detail, a silhouette communicates through outline alone. When done right, the result is bold, dramatic, and instantly compelling.
The technique is straightforward. You place your subject between the camera and a bright light source, then expose for the background, letting the subject go dark. But the difference between a mediocre silhouette and a striking one comes down to subject choice, timing, and a few critical camera decisions.
The Basics: How Silhouettes Work
A silhouette occurs when there is a large brightness difference between your subject and the background, and you expose for the brighter background. The subject becomes underexposed to the point of appearing black or nearly black, while the background retains its color and detail.
Any strong backlight source works:
- Sunset or sunrise sky
- Window light from behind the subject
- Studio lights or flash aimed toward the camera
- Bright walls, screens, or illuminated surfaces
The key requirement is contrast. The background must be significantly brighter than the subject.
Camera Settings for Silhouettes
Metering Mode
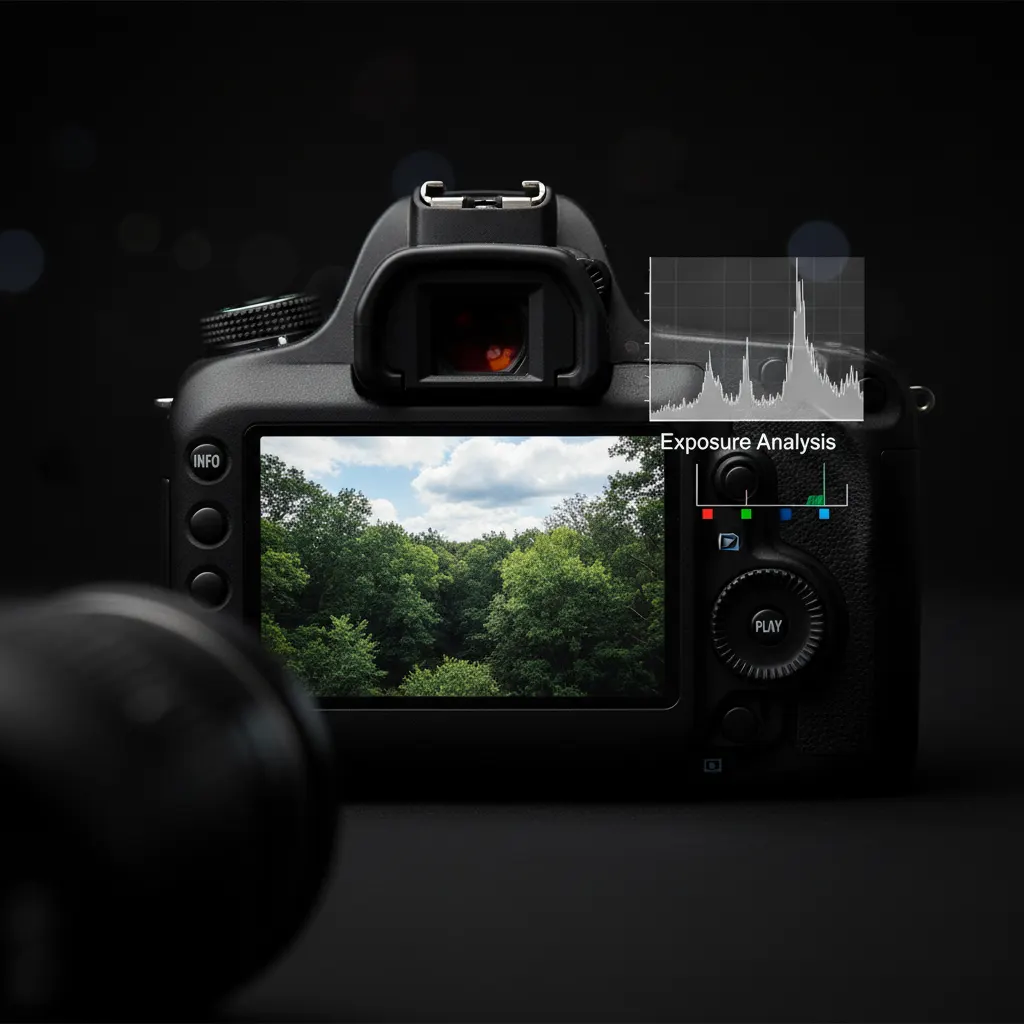
Switch to spot metering or center-weighted metering. Point the metering area at the bright background (the sky, for example), not at the subject. This tells the camera to expose for the highlights, which naturally plunges the subject into darkness. Understanding your histogram helps confirm that the subject is truly dark while the sky retains detail.
If you are using evaluative or matrix metering, the camera will try to balance the exposure and may brighten the subject, reducing the silhouette effect. You can compensate with negative exposure compensation (-1 to -3 stops), but spot metering on the background is more precise.
Manual Mode Approach
For full control, shoot in manual mode:
- Point the camera at the bright background and note the meter reading.
- Set your exposure to those values (or slightly underexpose the background by 1/3 to 2/3 stops for richer colors).
- Recompose with your subject in the frame.
- The subject will be dark while the background is properly exposed.
Aperture
Use f/8 to f/11 for most silhouette shots. This provides:
- Sharp focus across the frame
- Clean starburst effects if the sun is partially visible
- Sufficient depth of field for both subject and background
Wider apertures (f/2.8 to f/4) work when you want to isolate a subject against a blurred, colorful background, but be aware that focus precision becomes more critical.
Shutter Speed
Shutter speed depends on your aperture and the ambient light. Pre-sunset silhouettes may need 1/500s at f/8, while deep twilight might require 1/30s or longer. If shooting handheld, keep the shutter speed above the reciprocal of your focal length.
ISO
Start at ISO 100 or 200. You rarely need high ISO for silhouettes because you are exposing for the brightest part of the scene.
Autofocus Tip
Autofocus can struggle with silhouette subjects because they lack contrast. If the camera hunts, switch to manual focus and focus on the subject’s edge against the bright background, where contrast is highest. Alternatively, use single-point AF and place the focus point on the subject’s outline.
Choosing Strong Silhouette Subjects
The most important decision in silhouette photography is subject selection. Since you are removing all surface detail, the subject must communicate through shape alone.
Qualities of Great Silhouette Subjects
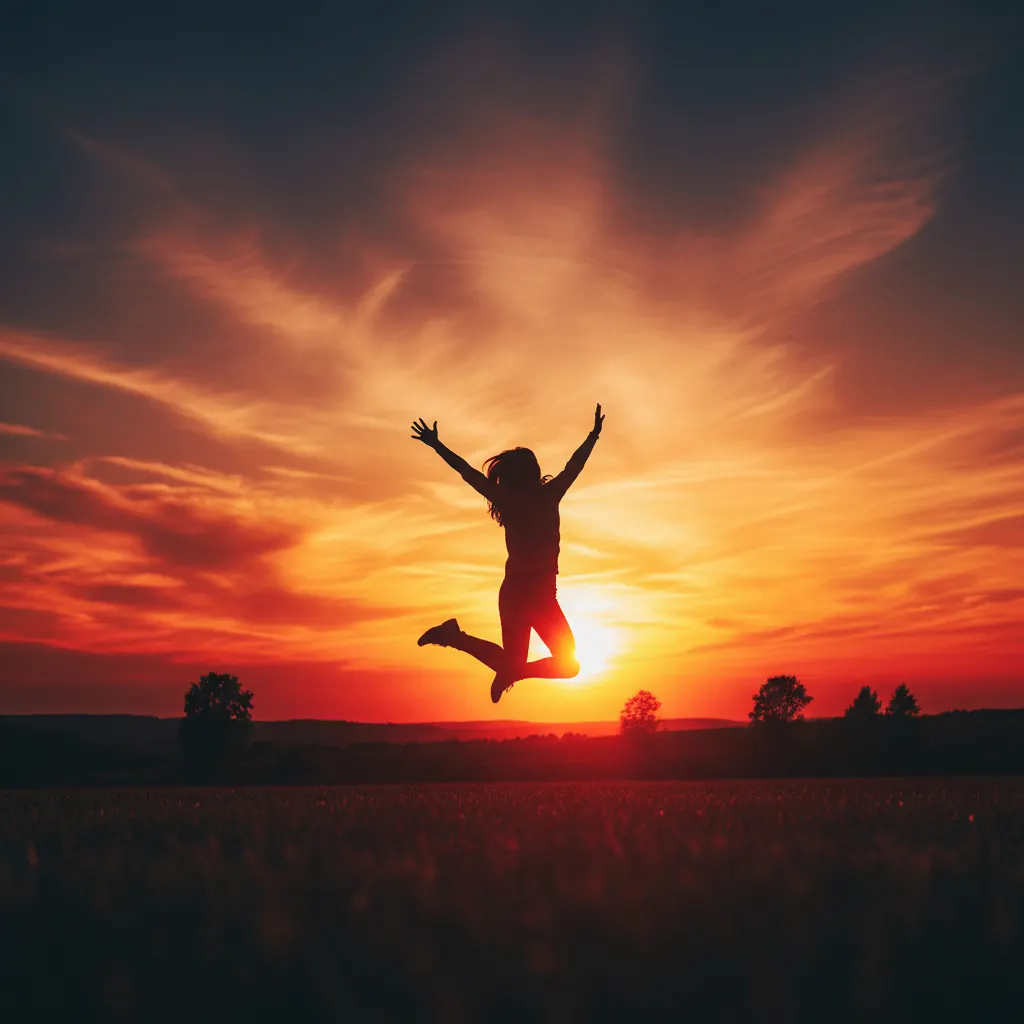
Recognizable outline. The viewer should instantly identify what the subject is. A person with spread arms, a cyclist on a hill, a lone tree on a horizon. If the shape is ambiguous, the image fails.
Clean edges. Smooth, distinct edges read well as silhouettes. Subjects with complex, overlapping edges can become a confusing dark blob.
Separation between elements. If photographing a person, have them spread their arms or legs so that each limb is visible against the bright background. A person standing with arms at their sides creates a featureless column. An arm extended, a hat tilted, or a bag slung over one shoulder adds character.
Single subjects or well-spaced groups. Multiple overlapping silhouettes merge into an undefined mass. Keep subjects separated so each shape reads clearly.
Strong Silhouette Subject Ideas
- People in action: jumping, dancing, running, yoga poses
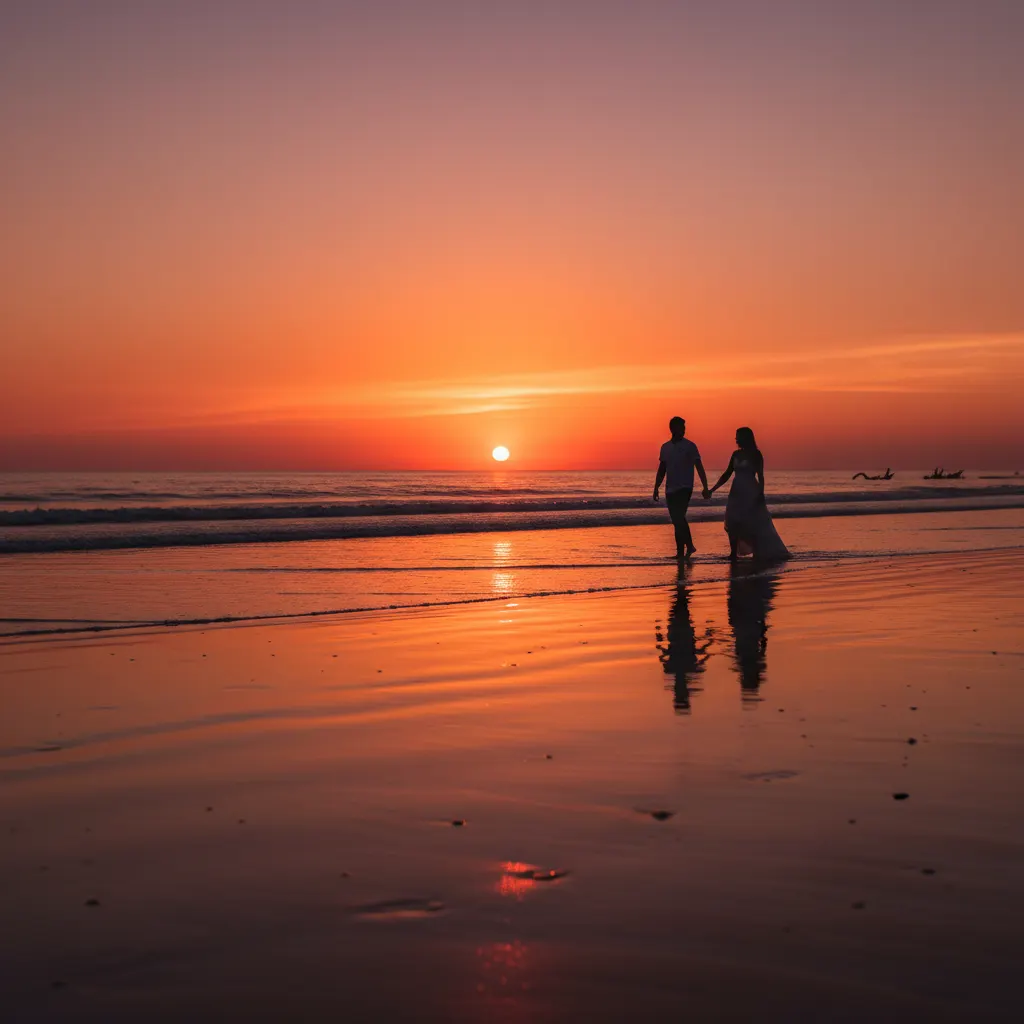
- Couples holding hands (with visible gap between bodies)
- Cyclists, skateboarders, or surfers
- Trees with distinctive branching patterns
- Architecture: bridges, monuments, cranes, windmills
- Animals: birds in flight, horses, cats on fences
- Musicians with instruments
- Fishermen casting a line
Timing and Location
Golden Hour and Sunset
The 30 minutes surrounding sunset — also known as golden hour — provide the most colorful backgrounds for silhouettes. For complete sunset shooting techniques beyond silhouettes, see our guide on how to photograph sunsets like a pro. The sky transitions through yellows, oranges, pinks, and purples, providing a vivid canvas behind your dark subject.
Position your subject between you and the setting sun. The subject does not need to be directly in front of the sun. Anywhere against the bright sky works, but having the sun just behind or beside the subject creates the strongest contrast.
Sunrise
Sunrise offers similar light but with fewer people and often calmer conditions. The color palette tends to be cooler (more pinks and magentas) compared to the warmer oranges of sunset.
Blue Hour
The period just before sunrise or after sunset produces deep blue silhouettes against a graduated blue-to-orange sky. If you enjoy shooting in the dark, our guide on how to photograph the night sky covers techniques for capturing silhouettes against star-filled skies. The effect is more subtle and moody than golden hour silhouettes.
Indoor Silhouettes
Windows are natural backlight sources. Position your subject in front of a bright window and expose for the window light. This works any time of day and in any weather.
For a clean indoor silhouette, the room should be relatively dark with minimal light bouncing onto the subject’s front. Close blinds on other windows and turn off interior lights.
Composition Techniques
Place the Subject on the Horizon
Silhouettes work best when the subject is positioned against the brightest, cleanest part of the background. Placing a person on a hilltop or ridge puts them entirely against sky, eliminating competing dark elements.
Use Negative Space
Give your silhouette room to breathe. A small, dark figure against a vast, colorful sky creates a powerful sense of scale and solitude. Resist the urge to fill the frame with the subject.
Include Environmental Context
A fisherman silhouetted against a lake tells a story. The same silhouette against a featureless sky is less compelling. Include just enough environment to establish a setting.
Leading Lines to the Subject
Roads, fences, shorelines, or paths leading toward the silhouette guide the viewer’s eye and add depth to the composition. These and other arrangement techniques are covered in our guide to composition rules every photographer should know.
Symmetry and Reflections
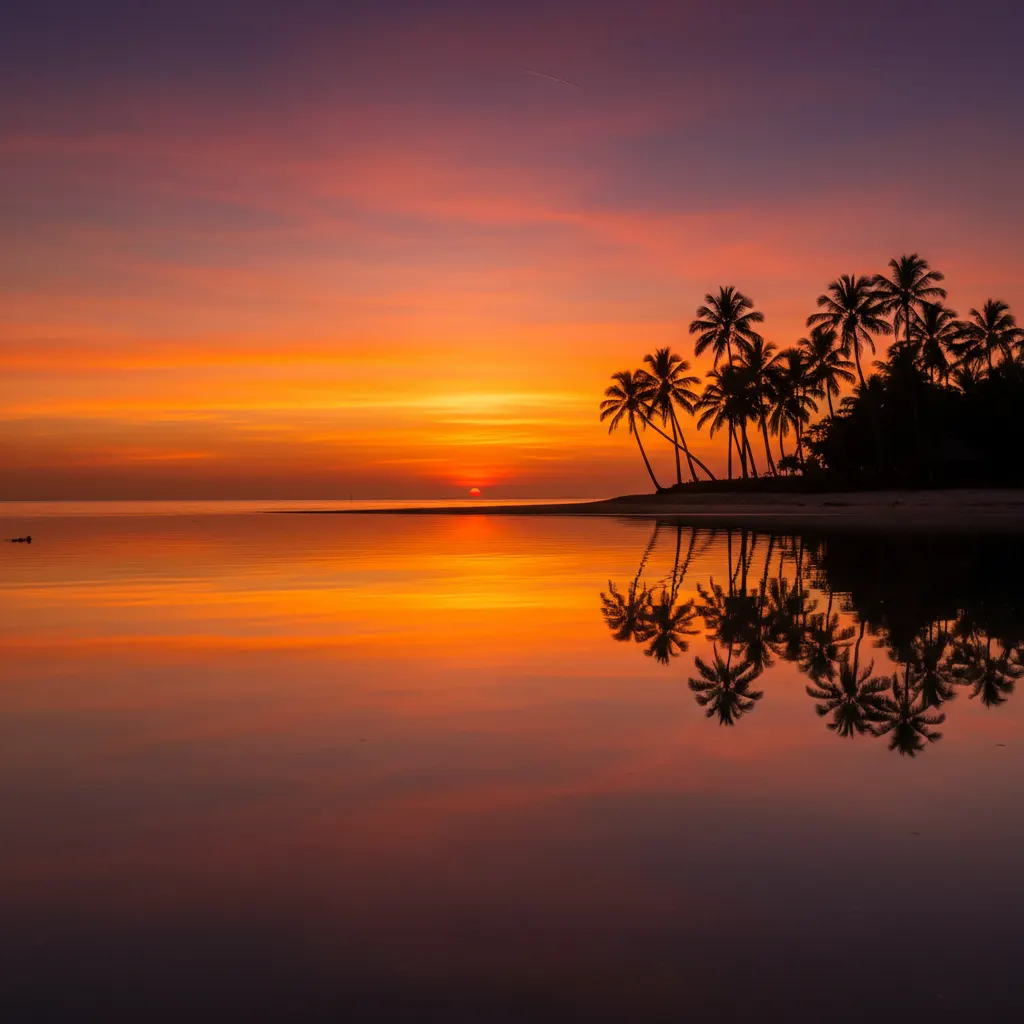
A silhouette reflected in water doubles the visual impact. Calm water at sunset creates perfect mirror silhouettes. Position the reflection line in the center of the frame for maximum symmetry.
Recommended Camera Settings Table
Here is a quick-reference for specific silhouette scenarios with tested settings:
| Scenario | Aperture | Shutter Speed | ISO | Metering | Notes |
|---|---|---|---|---|---|
| Person against sunset sky | f/8 | 1/250s to 1/500s | 100 | Spot on sky | Classic golden hour silhouette |
| Tree on hilltop at twilight | f/11 | 1/60s to 1/125s | 200 | Spot on bright horizon | Use tripod below 1/60s |
| Bird in flight against sky | f/8 | 1/1000s to 1/2000s | 200-400 | Spot on sky | Continuous AF with tracking |
| Person in doorway/window | f/5.6 | 1/125s to 1/250s | 400 | Spot on window light | Works any time of day |
| Sun starburst behind subject | f/16 to f/22 | 1/125s to 1/500s | 100 | Spot on sky near sun | Narrow aperture creates starburst |
| Couple on beach at sunset | f/8 | 1/250s | 100 | Spot on brightest sky area | Ensure separation between figures |
For the sun starburst effect, lenses with straight aperture blades produce more defined star points. The Nikon Z 24-70mm f/4 S and Canon RF 16mm f/2.8 STM are known for producing clean starburst patterns at f/16. Lenses with rounded aperture blades, designed for smooth bokeh, produce softer, less defined starburst rays.
Real-World Tips from Experienced Photographers
Meter off the sky, then recompose. The most reliable silhouette technique is to point your camera at the brightest part of the sky (avoiding the sun itself), half-press the shutter to lock exposure using AE-Lock, then recompose with your subject in the frame. On cameras like the Sony A7 IV or Nikon Z6 III, you can assign AE-Lock to a custom button for quick access.
Slightly underexpose the background for richer colors. After metering on the sky, dial in -1/3 to -2/3 stops of exposure compensation. This deepens the oranges and purples in the sunset sky while ensuring the silhouette subject is completely dark. Many photographers find that slightly underexposed sunset skies look more vivid and dramatic than correctly exposed ones.
Use a telephoto to compress subject and sun. A 200mm or 300mm lens makes the setting sun appear much larger relative to your subject. A person standing on a distant hilltop with a massive orange sun behind them is a classic composition that requires a long focal length. The Canon RF 100-400mm f/5.6-8 IS USM or Tamron 70-300mm f/4.5-6.3 Di III RXD are affordable telephoto options that work well for this effect.
Shoot continuously during the last 15 minutes before sunset. The sky changes rapidly and unpredictably during this window. Clouds shift, colors intensify, and light rays can appear and disappear in seconds. Fire bursts of 3 to 5 frames every time the sky changes, and you will capture moments you would miss with a more deliberate, one-shot approach.
Common Mistakes and Fixes
Subject is too bright. The camera’s meter is compensating. Use spot metering on the sky, or dial in -2 to -3 stops of exposure compensation.
Subject merges with dark foreground. If the bottom of the subject blends into dark ground, reposition so the entire subject is outlined against the bright background. Shooting from a lower angle often helps.
Edges are not sharp. Focus on the subject’s outline where it meets the bright background. Use a narrow aperture (f/8+) for deeper focus.
Background is boring. A silhouette against a plain, washed-out sky has no impact. Wait for interesting clouds, color gradients, or dramatic light.
Too much detail visible in the subject. If you can see the subject’s features, you are not underexposed enough. Reduce exposure further. In post-processing, crush the blacks to ensure the subject is truly dark.
Post-Processing Silhouettes
Silhouettes benefit from minimal but targeted editing:
- Increase contrast to push the subject darker and the background brighter.
- Boost vibrance and saturation to intensify sky colors.
- Crush the blacks using the tone curve or blacks slider. Pull the shadow end down until the subject is a clean, solid dark shape.
- Add clarity to enhance cloud texture and sky detail.
- Crop for impact. Remove any distracting elements at the edges.
Silhouette photography is proof that sometimes less is more. By removing detail and color from your subject, you force the viewer to engage with shape, gesture, and story. It is a technique that works with the simplest gear and in the most common lighting conditions, yet it produces images that feel timeless and dramatic.
Frequently Asked Questions
What camera settings should I use for silhouette photography? Set your camera to manual mode or aperture priority with negative exposure compensation (-2 to -3 stops). Use spot metering aimed at the bright background sky, not the subject. An aperture of f/8 to f/11 provides sharp focus across the frame, and ISO 100 keeps noise low since you are exposing for the brightest part of the scene. For sunset silhouettes, typical settings are f/8, 1/250 to 1/500 second, ISO 100. The key is to expose for the sky and let the subject go completely dark.
How do I get a sharp silhouette with clean edges? Sharp edges come from three factors: proper focus, a narrow enough aperture, and good separation between the subject and background. Focus on the subject’s outline where it meets the bright sky, as this is where contrast is highest and autofocus performs best. Use f/8 or narrower for deep depth of field. Ensure the entire subject is outlined against the bright background — if part of the subject overlaps with a dark foreground like a hillside, those edges will merge and lose definition. Shooting from a lower angle often helps place more of the subject against the sky.
Can I shoot silhouettes indoors? Yes, indoor silhouettes work well using window light as the backlight source. Position your subject directly in front of a bright window and expose for the window light. Close curtains or blinds on other windows and turn off interior lights to prevent light from bouncing onto the front of the subject. A large, north-facing window on a bright day provides ideal, even backlight. You can also create indoor silhouettes using a studio backdrop lit from behind, a brightly lit hallway, or even a large television or monitor displaying a white screen.
You might also like
How to Photograph Sunsets Like a Pro
Capture stunning sunset photos with the right exposure settings, silhouette techniques, graduated filters, and HDR methods.
How to Photograph Reflections Creatively
Discover techniques for capturing stunning reflections in water, glass, and puddles, plus how polarizing filters give you creative control.
How to Use the Histogram in Photography
Master histogram reading to nail exposure every time. Learn about clipping warnings, expose to the right, and practical histogram use in the field.