How to Photograph Reflections Creatively
Discover techniques for capturing stunning reflections in water, glass, and puddles, plus how polarizing filters give you creative control.
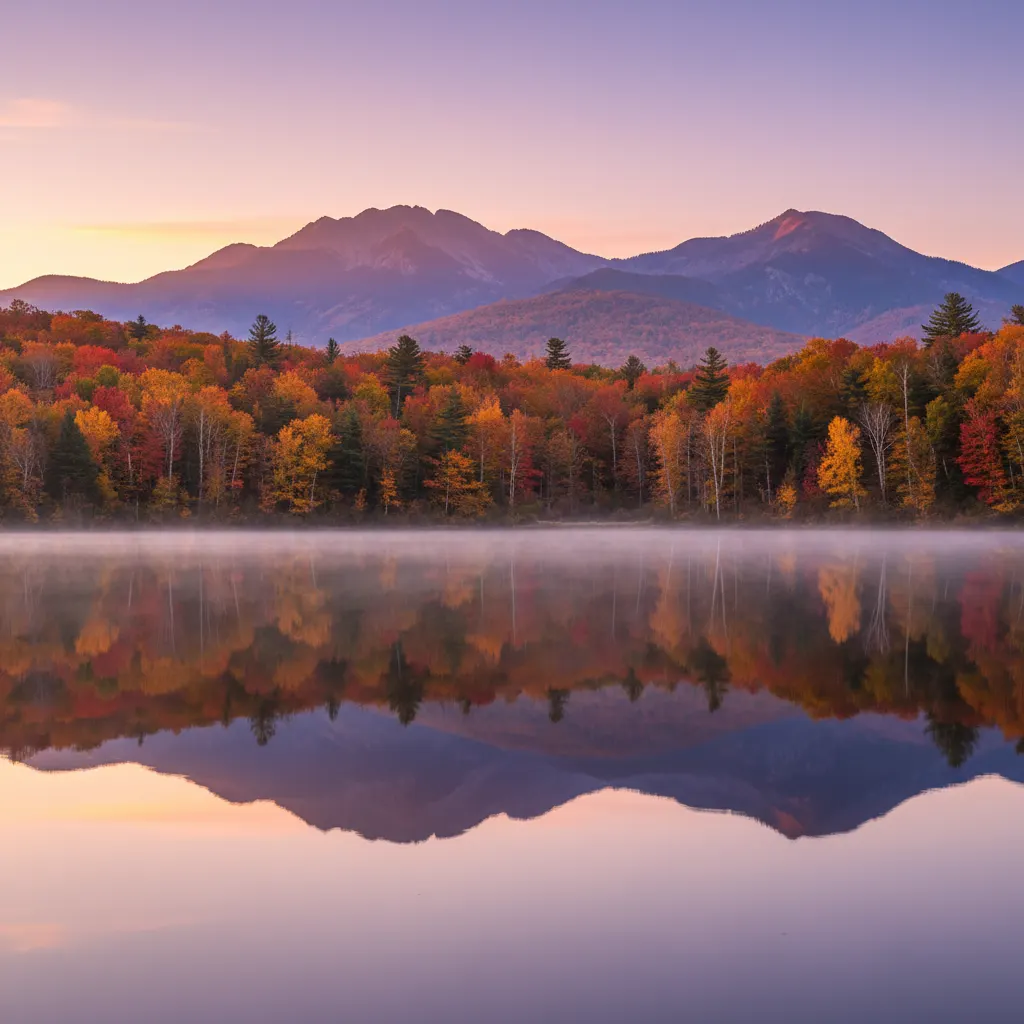
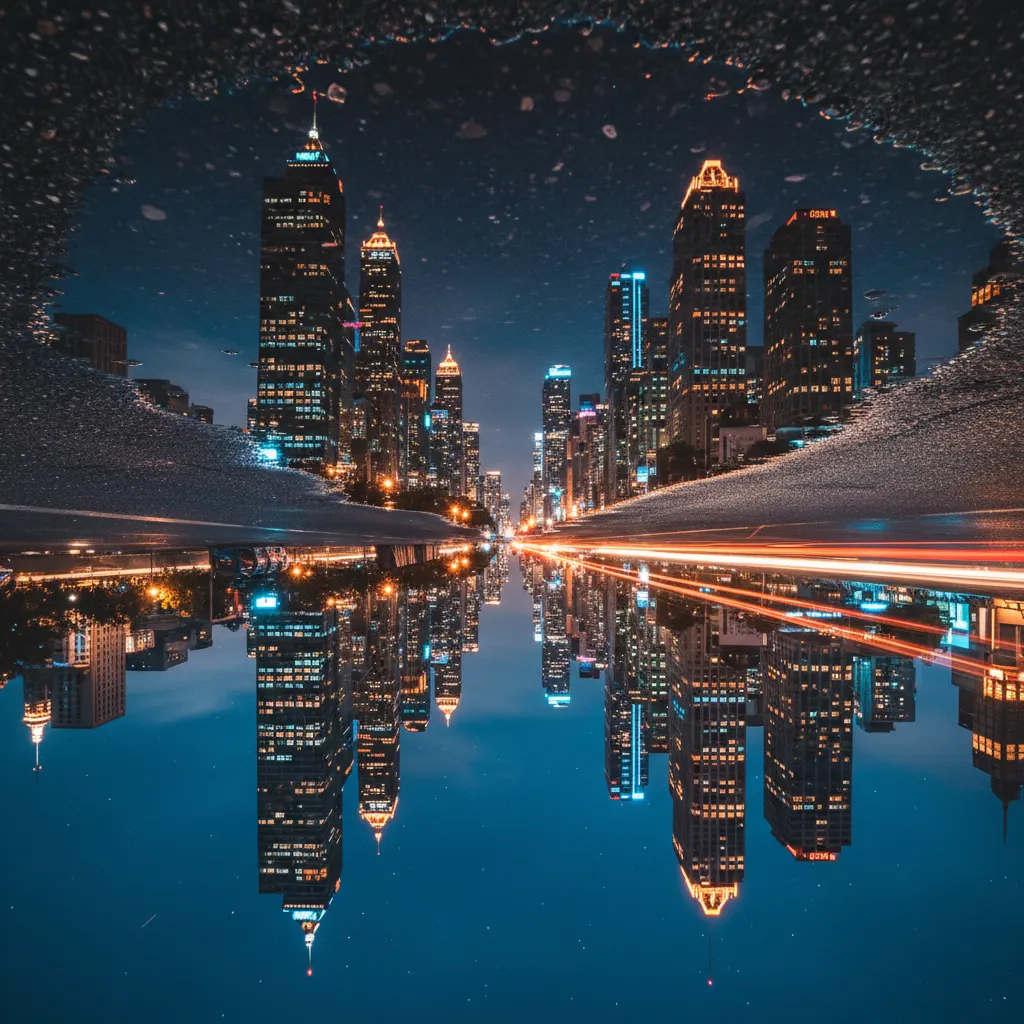
Learning how to photograph reflections creatively opens up an entirely new dimension in your image-making. Reflections add symmetry, depth, and a sense of wonder to photographs. A mountain mirrored in a still lake, a cityscape doubled in a rain-soaked street, a portrait reflected in a shop window. These images catch the eye because they present the world in an unexpected way.
Photographing reflections well requires understanding where to find them, how to control them, and when to eliminate them. Here is everything you need to know.
Water Reflections
Water is the most common and rewarding surface for reflection photography. The key variable is the water’s surface condition.
Still Water for Mirror Reflections
Perfectly still water produces mirror-like reflections. You will find these conditions:
- Early morning before wind picks up. Lakes and ponds are calmest at dawn. Even a slight breeze creates ripples that fragment the reflection.
- Sheltered areas. Bays, inlets, and water protected by trees or buildings stay calmer than open water.
- Small bodies of water. Puddles, fountains, and small ponds are less affected by wind than large lakes.
For mirror reflections, get your camera as low as possible to the water’s surface. This maximizes the reflected area in your frame. Even lying flat on the ground produces a more dramatic reflection than shooting from standing height.
Moving Water for Abstract Reflections
Rippled water creates fragmented, painterly reflections. Colored buildings reflected in a gently moving canal become abstract streaks of color. City lights on a river at night transform into shimmering vertical lines.
For moving water reflections:
- Use a slower shutter speed (1/15s to 1 second) to smooth the ripples slightly and blend the reflected colors.
- Shoot during blue hour or at night when artificial lights create vivid color reflections on water. The period just after sunset is ideal for this kind of shot.
- Focus on the reflected colors rather than trying to create a clear mirror image. Embrace the abstraction.
Puddle Reflections
Puddles are the urban photographer’s secret weapon. After rain, every sidewalk, parking lot, and street becomes a potential reflection surface.
Technique for Puddle Shots
- Get extremely low. Place your camera inches above the puddle surface. Flip out your LCD screen and use live view to compose without lying face-down on wet pavement.
- Use a wide-angle lens. A 16-35mm or similar wide lens at close range creates a dramatic foreground-to-background perspective with the puddle dominating the lower frame.
- Focus on the reflection, not the puddle surface. Since the reflected subject is at a different distance than the water surface, you need to choose your focus point carefully. Focus on the reflected building or sky for sharpness where it matters.
- Include both the real subject and its reflection. The most compelling puddle photos show the actual scene in the top half and the reflected version in the bottom half, creating a surreal doubled world.
Finding the Right Puddles
Not all puddles work. Look for:
- Shallow puddles on flat, dark surfaces (asphalt works well)
- Puddles large enough to reflect your intended subject
- Locations where interesting architecture, signs, or lights are nearby
- Puddles without debris, leaves, or oil slicks (unless you want rainbow effects)
Glass and Window Reflections
Glass surfaces offer controlled, predictable reflections that work well in urban environments.
Building Facades
Modern glass-clad buildings reflect their surroundings like enormous mirrors. Older buildings reflected in newer glass facades create compelling contrasts between architectural styles.
Shoot from an angle rather than straight on. A 30 to 45-degree angle to the glass surface produces the strongest reflections while revealing the most interesting compositions.
Shop Windows
Store windows create layered images where the reflected street scene overlaps with the interior display. This double-exposure effect happens naturally and can be enhanced by choosing your angle to balance the brightness of the reflection versus the interior.
Car Reflections
Car hoods, doors, and windows produce curved, distorted reflections that add an abstract quality. Chrome bumpers and side mirrors on classic cars are particularly photogenic.
Creative Angles and Compositions
Flip the Image
Shoot the reflection only, without the actual subject in frame. When the viewer sees the image, or when you flip it upside down in post-processing, it creates a disorienting, dreamlike effect.
Symmetry and the Rule of Thirds
Place the reflection line (where reality meets its mirror image) on the center line for perfect symmetry, or on a third line for a more dynamic composition. These principles are covered in depth in our guide to composition rules every photographer should know. Both approaches work depending on the mood you want.
Perfect symmetry conveys calm, balance, and stillness. An off-center split feels more dynamic and draws attention to either the real or reflected version.
Frame Within a Frame
Use a puddle, window, or mirror as a natural frame within your photograph. The reflection becomes a contained world inside the larger image.
Partial Reflections
You do not always need a complete mirror image. A partial reflection that shows just a fragment of the subject can be more intriguing than a perfect duplicate. A face partially visible in a rain-streaked window tells more story than a clear mirror reflection.
Using a Polarizing Filter
A circular polarizing filter (CPL) is the most important accessory for reflection photography because it gives you variable control over how much reflection appears in your image.
How It Works
A polarizing filter blocks light waves vibrating in a specific direction. Reflections from non-metallic surfaces (water, glass, wet surfaces) are partially polarized, so a CPL can reduce or eliminate them. Rotate the filter on your lens to control the effect from zero to maximum polarization.
When to Use a Polarizer
To reduce reflections: Rotate the filter to cut through water surface reflections and see the rocks or fish below. Remove window reflections to photograph interiors from outside.
To enhance reflections: Counter-intuitively, a polarizer can also enhance reflections. At certain angles, rotating it away from maximum polarization actually cleans up the surrounding tones while leaving the reflection intact, making it appear more vivid.
To deepen sky and water colors: A polarizer removes atmospheric haze and glare from water surfaces, intensifying the blue of skies and the saturation of wet surfaces.
Polarizer Limitations
- Polarizers reduce light transmission by 1 to 2 stops, requiring longer exposures or higher ISO.
- They are most effective at 90 degrees to the light source and have minimal effect when pointed directly at or away from the light.
- With ultra-wide lenses (wider than 24mm on full frame), polarizers can create uneven darkening across the sky.
- They do not work on metallic reflections.
Camera Settings for Reflection Photography
Aperture
Use f/8 to f/11 for landscape reflections where you want everything sharp from foreground to reflected background. For creative shots focusing selectively on the reflection, open up to f/2.8 to f/4.
Shutter Speed
- Fast (1/250s+): Freezes ripples for partially fragmented but sharp reflections.
- Moderate (1/15s to 1/2s): Smooths small ripples while maintaining the reflection shape.
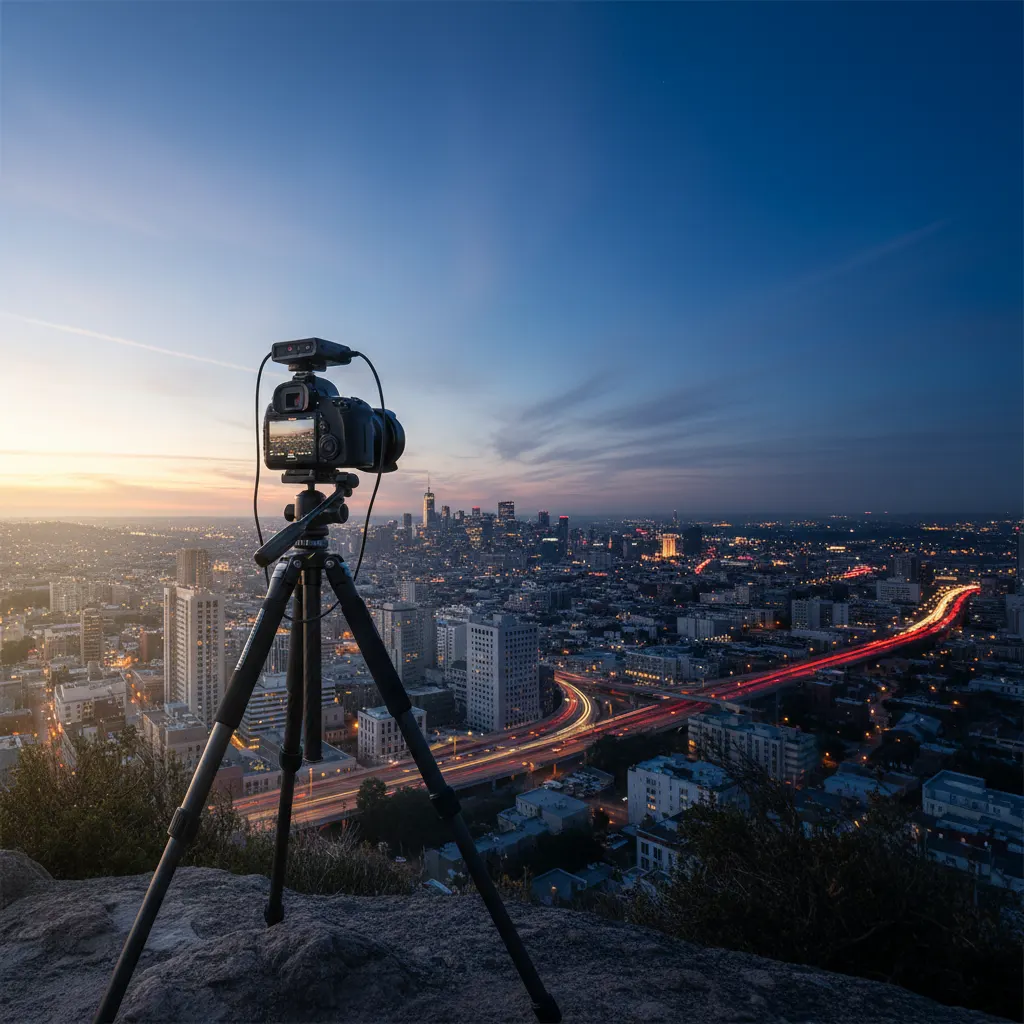
- Long (1-30 seconds): Completely smooths water for mirror-like stillness, even in windy conditions. Requires a tripod and possibly an ND filter. For a full walkthrough of this approach, see our guide on how to shoot long exposure photography.
ISO and Focus
Keep ISO low (100-400) since reflection shots often benefit from tripod use anyway. A sturdy support makes a real difference — see our guide to the best tripods for photography for options at every price point. Focus manually or use single-point AF placed on the reflected subject rather than the reflective surface.
Recommended Camera Settings Table
Here is a quick-reference table for the most common reflection photography scenarios:
| Scenario | Aperture | Shutter Speed | ISO | Notes |
|---|---|---|---|---|
| Lake mirror reflection (dawn) | f/11 | 1/15s to 1s | 100 | Use tripod, remote shutter release |
| Puddle reflection (urban) | f/8 | 1/125s to 1/250s | 200-400 | Wide-angle lens, camera low to ground |
| Glass building facade | f/8 | 1/250s | 100-200 | Shoot at 30-45 degree angle to glass |
| Moving water abstract | f/8 | 1/4s to 2s | 100 | Tripod required, consider ND filter |
| Night city reflection on water | f/5.6 | 2s to 15s | 400-800 | Tripod essential, use mirror lock-up |
| Rain-soaked street at night | f/4 to f/5.6 | 1/30s to 1/4s | 800-1600 | Stabilized lens helps, shoot wide open |
Cameras with in-body image stabilization like the Sony A7 IV (5.5 stops IBIS), Canon R6 Mark II (8 stops IBIS), or Nikon Z6 III give you an advantage when shooting handheld reflection photos at slower shutter speeds. For long exposure reflection work where you want perfectly smooth water, pair a sturdy tripod with a 6-stop or 10-stop ND filter from brands like NiSi or Hoya.
Common Mistakes to Avoid
Shooting from standing height. The most common mistake in reflection photography is not getting low enough. A reflection visible from eye level becomes dramatically more prominent when the camera is six inches above the water or puddle surface. Use a camera with a tilt screen, like the Fujifilm X-T5 or Canon R6 Mark II, to compose comfortably at ground level without lying flat.
Ignoring the wind. Even a light breeze can destroy a mirror reflection on water. If conditions are slightly windy, use a longer exposure (2 to 30 seconds with an ND filter) to average out the ripples and restore a smoother reflected surface. Alternatively, find a sheltered spot where trees or buildings block the wind.
Focusing on the water surface instead of the reflection. The reflected image is optically farther away than the water surface itself. If you focus on the surface, the reflection will be soft. Place your autofocus point on a detailed part of the reflection — a building edge, a tree branch, or a mountain peak — for the sharpest result.
Forgetting to level the horizon. Reflection compositions rely on symmetry, and even a slightly tilted horizon line is immediately obvious. Use your camera’s built-in electronic level (available on virtually all mirrorless cameras from Sony, Canon, Nikon, and Fujifilm) to ensure the horizon is perfectly straight.
Using a polarizer at the wrong angle. A circular polarizing filter rotated to maximum polarization can completely eliminate the reflection you are trying to photograph. Always check the effect through the viewfinder as you rotate the filter, and remember that the polarizer’s effect changes with your angle to the light source.
Best Conditions for Reflection Photography
- Just after rain: Wet surfaces everywhere create endless reflection opportunities. Rain-soaked streets are also perfect for street photography, where puddle reflections add drama to urban scenes.
- Dawn: Calmest water, softest light, fewest people. The soft warmth of golden hour makes dawn reflections especially rewarding.
- Blue hour and night: Artificial lights produce vivid, colorful reflections. If you also enjoy shooting after dark, our guide on how to photograph the night sky covers techniques for capturing stars reflected in still water.
- Overcast days: Even light with no harsh highlights or shadows.
- Winter: Frozen lakes with thin ice create unique partial reflections.
Real-World Tips from Experienced Photographers
Scout locations after rain, not during it. The best puddle reflections appear in the first 30 minutes after rain stops, when the water is still and the sky is clearing. Active rainfall creates too many ripples and obscures reflections.
Use a telephoto for compressed reflections. While wide-angle lenses are the go-to for dramatic foreground reflections, a 70-200mm lens aimed at a distant lake can compress the reflection and the real subject into a tight, powerful composition. Photographers working with lenses like the Sony FE 70-200mm f/2.8 GM II or Canon RF 70-200mm f/2.8L IS USM often use this technique for mountain lake shots where the reflection fills the entire lower half of the frame.
Flip your camera upside down for ultra-low puddle shots. When you need the lens even closer to the water than a flip screen allows, turn the camera upside down so the lens nearly touches the surface. You can rotate the image 180 degrees in post. This technique works particularly well with weather-sealed bodies like the Nikon Z8 or Olympus OM-1 Mark II that can handle proximity to water.
Reflection photography trains your eye to see the world differently. Once you start looking for reflective surfaces, you will find them everywhere: in a spilled drink, a marble floor, a car door, a soap bubble. The creative possibilities are genuinely endless.
Frequently Asked Questions
What is the best camera setting for reflection photography? For mirror-like water reflections, use f/8 to f/11 for sharpness across the frame, ISO 100 for clean files, and a shutter speed between 1/15 second and several seconds depending on conditions. Use a tripod for anything slower than 1/60 second. Long exposures of 2 to 30 seconds with an ND filter smooth out ripples and produce glass-like water surfaces even in breezy conditions. For puddle reflections in urban settings, f/8 at 1/125 to 1/250 second works well handheld.
Do I need a polarizing filter for reflection photography? A circular polarizing filter is highly useful but not strictly required. It gives you variable control over how much reflection is visible — rotate it one way to enhance reflections, rotate it the other way to reduce or eliminate them. This is especially valuable when shooting through glass windows or when you want to see through water to the rocks below. A polarizer does reduce light by 1 to 2 stops, so factor that into your exposure. Budget around $50 to $150 for a quality CPL from brands like B+W, Hoya, or NiSi.
How do I get sharp reflections in water? Focus on the reflected subject, not the water surface. The reflection is optically at a greater distance than the water itself, so focusing on the surface will leave the reflected image soft. Use single-point autofocus placed on a high-contrast element within the reflection, such as a building edge or tree line. For maximum sharpness across both the real scene and its reflection, use f/11 and focus roughly one-third into the scene using the hyperfocal distance principle.
You might also like

How to Shoot Silhouettes: A Step-by-Step Guide
Master silhouette photography with backlighting techniques, exposure metering tips, subject selection, and creative composition ideas.
Time-Lapse Photography Tutorial: From Setup to Final Video
Learn how to create stunning time-lapse videos with the right intervalometer setup, camera settings, post-processing workflow, and gear.

Food Photography Tips for Beginners
Learn essential food photography techniques including lighting setups, angles, styling, props, and editing to make your food shots stand out.