Mastering Golden Hour Photography
Learn how to make the most of golden hour light for portraits and landscapes with practical camera settings and composition tips.
Golden hour is the most forgiving and flattering light in photography. That warm, low-angle sunlight shortly after sunrise and before sunset wraps around subjects, creates long shadows, and bathes everything in a golden glow. Professional photographers plan entire shoots around it. Here is how to take full advantage.
What Exactly Is Golden Hour?
Golden hour refers to the period roughly 30 to 60 minutes after sunrise and 30 to 60 minutes before sunset. The sun sits low on the horizon, and its light passes through more atmosphere, which filters out harsh blue wavelengths and leaves warm reds, oranges, and yellows.
The exact duration varies by season and latitude. Near the equator, golden hour is brief — sometimes only 20 minutes. In northern regions during summer, it can last well over an hour.
How to Find the Exact Times
Apps like PhotoPills, The Photographer’s Ephemeris, or even a simple Google search for “golden hour time [your location]” will give you precise start and end times. Arrive at your location at least 15 minutes early to set up and scout compositions.
Camera Settings for Golden Hour
Portraits
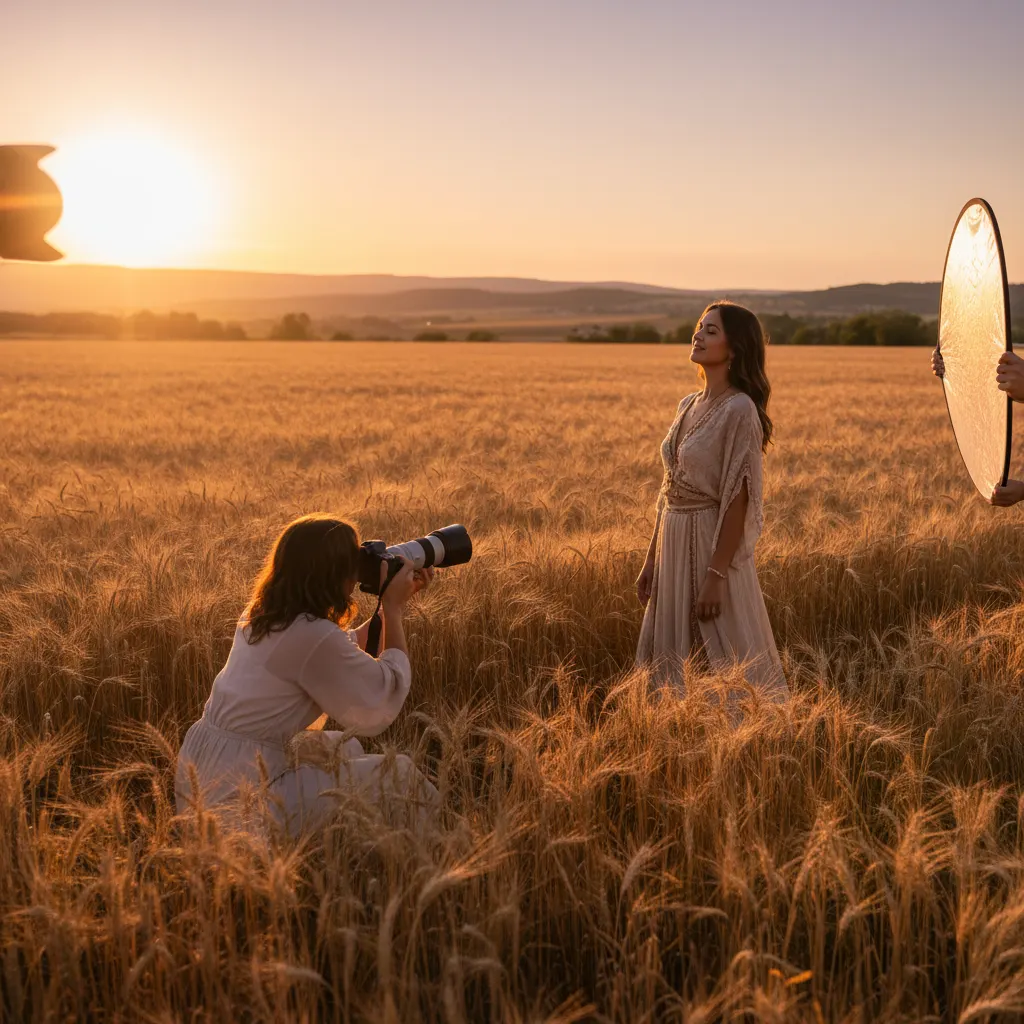
Golden hour light is naturally soft and warm, which makes it ideal for portraits without any modifiers or reflectors.
- Mode: Aperture Priority (A/Av) or Manual mode
- Aperture: f/1.8 to f/2.8 for a shallow depth of field and creamy bokeh — a quality portrait lens makes a big difference here. Use f/4 to f/5.6 for groups.
- ISO: 100 to 400. The light changes quickly, so keep an eye on your exposure.
- Shutter speed: At least 1/200s to freeze any subject movement. Faster if shooting children or pets.
- White balance: Daylight or Shade. The Shade preset adds extra warmth that complements golden hour. Alternatively, set a manual Kelvin value around 5500K to 6500K.
- Metering: Evaluative/Matrix for most situations. Switch to Spot metering if your subject is backlit and you want to expose for their face.
Landscapes
- Mode: Aperture Priority or Manual
- Aperture: f/8 to f/11 for maximum sharpness across the frame.
- ISO: 100 (base ISO for cleanest files).
- Shutter speed: Determined by your aperture and ISO. Use a tripod if speeds drop below 1/60s.
- White balance: Daylight preserves the natural warmth. Auto white balance may neutralize the golden tones, which defeats the purpose.
Composition Techniques
Shoot Into the Light (Backlighting)
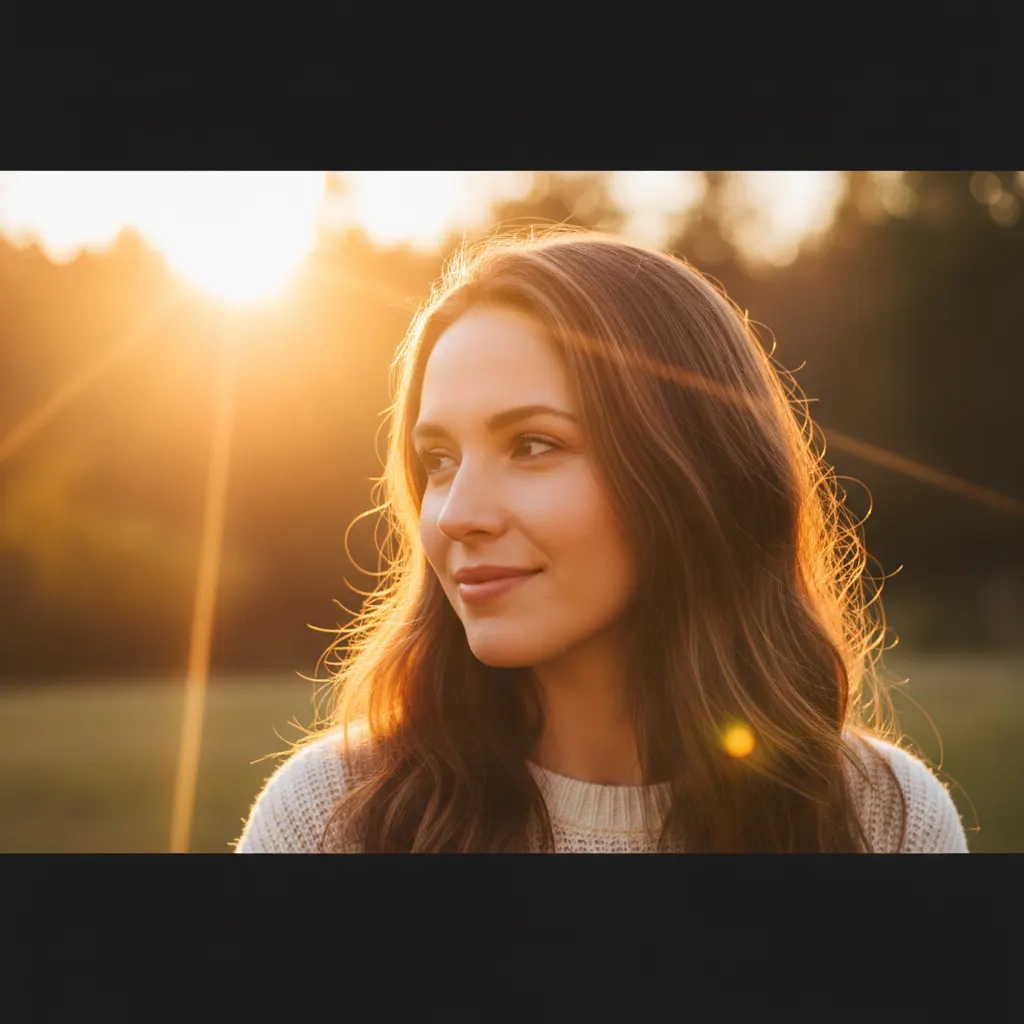
Position your subject between you and the sun. This creates a beautiful rim light — a glowing outline around hair, shoulders, or the edges of objects. For portraits, this is the signature golden hour look.
To expose correctly for a backlit subject, add +1 to +2 stops of exposure compensation, or use spot metering on their face. The background will blow out, but that is part of the aesthetic.
Use Side Lighting for Texture
When the sun hits your subject from the side, it reveals texture and dimension. This works exceptionally well for landscapes — rolling hills, sand dunes, tree bark, old buildings. The long shadows created by low-angle light add depth and drama.
Shoot With the Light Behind You (Front Lighting)
Front lighting at golden hour is even, warm, and flattering. Subjects are evenly lit without harsh shadows. This is the easiest direction to work with and produces consistently good results for both portraits and landscapes.
Incorporate Shadows
Long shadows are a golden hour signature. Use them as leading lines, patterns, or compositional elements. Photograph your own shadow stretching across a field, or capture the shadow of a fence zigzagging across a path.
Lens Flare as a Creative Element
Shooting directly into the low sun can produce lens flare — streaks or circles of light in your image. While flare is often considered a flaw, at golden hour it adds warmth and atmosphere. To control it:
- Partially hide the sun behind a tree, building, or your subject.
- Remove your lens hood to allow more flare.
- Use a prime lens — zoom lenses with more glass elements produce more complex (and sometimes messy) flare patterns.
Golden Hour for Portraits
Positioning Your Subject
The most flattering setup is to place the sun behind your subject at roughly 45 degrees. This creates that glowing rim light while keeping their face in open shade. Use a reflector (even a white poster board works) to bounce warm light back onto their face if needed.
Eye Catchlights
At golden hour, the sky opposite the sun acts as a giant, warm softbox. Position your subject facing this ambient light to get beautiful catchlights — the reflections of light in their eyes that make portraits feel alive.
What to Wear
Advise portrait subjects to wear warm-toned clothing — earth tones, whites, creams, pastels. These colors harmonize with golden hour light. Avoid neon colors or stark whites, which can reflect color casts onto skin.
Golden Hour for Landscapes
Scout Your Location in Advance
Visit your shooting location during the day to plan your composition. Know exactly where the sun will rise or set so you can position yourself correctly. Use the compass feature in PhotoPills or Sun Surveyor to visualize the sun’s path.
Use a Graduated ND Filter
During golden hour, the sky is often much brighter than the foreground. A graduated neutral density filter (or its digital equivalent in post-processing) helps balance the exposure, keeping detail in both the bright sky and the darker ground.
Include a Foreground Element
Golden hour light raking across a foreground — wildflowers, rocks, a winding path — adds depth and draws the viewer into the scene. Combine this with a wide-angle lens at f/8 to f/11 for a composition that is sharp from front to back.
Recommended Camera Settings Table
| Scenario | Aperture | Shutter Speed | ISO | White Balance |
|---|---|---|---|---|
| Backlit portrait | f/1.8 – f/2.8 | 1/200s – 1/500s | 100 – 200 | Shade (6500K) |
| Group portrait | f/4 – f/5.6 | 1/200s | 200 – 400 | Daylight (5500K) |
| Landscape (tripod) | f/8 – f/11 | 1/15s – 1/60s | 100 | Daylight (5500K) |
| Landscape (handheld) | f/8 | 1/125s+ | 200 – 400 | Daylight (5500K) |
| Silhouette | f/8 – f/11 | 1/250s – 1/500s | 100 | Daylight (5500K) |
| Sun starburst | f/16 – f/22 | 1/60s – 1/250s | 100 | Daylight (5500K) |
For the sun starburst effect, narrow apertures like f/16 or f/22 turn the sun into a defined star shape. This works best when the sun is partially obscured by a horizon line, tree, or building edge. Lenses with an even number of aperture blades (such as the Canon RF 24-70mm f/2.8 L with 9 blades) produce 18-pointed stars, while lenses with odd blade counts create fewer, more defined points.
Recommended Gear for Golden Hour
- Portrait Lens: The Canon RF 85mm f/1.2 L, Sony FE 85mm f/1.4 GM, or Nikon Z 85mm f/1.2 S are the gold standard for golden hour portraits. Their wide apertures produce stunning background compression and creamy bokeh that makes backlit golden hour portraits glow. For a budget option, the Viltrox 85mm f/1.8 or Canon RF 50mm f/1.8 STM deliver beautiful results at a fraction of the cost.
- Landscape Lens: A wide-angle zoom like the Tamron 17-28mm f/2.8 Di III (for Sony) or the Nikon Z 14-30mm f/4 S provides the field of view needed for expansive golden hour landscapes with dramatic foreground elements.
- Reflector: A 5-in-1 collapsible reflector (around $20 to $40) is the single most useful golden hour portrait accessory. Use the gold or silver side to bounce warm light onto a backlit subject’s face. The gold surface adds extra warmth that amplifies the golden hour feel.
- Graduated ND Filter: The Lee Filters system or NiSi 100mm graduated ND filters help balance bright golden hour skies with darker foregrounds. A soft-edge 3-stop grad ND is the most versatile starting choice.
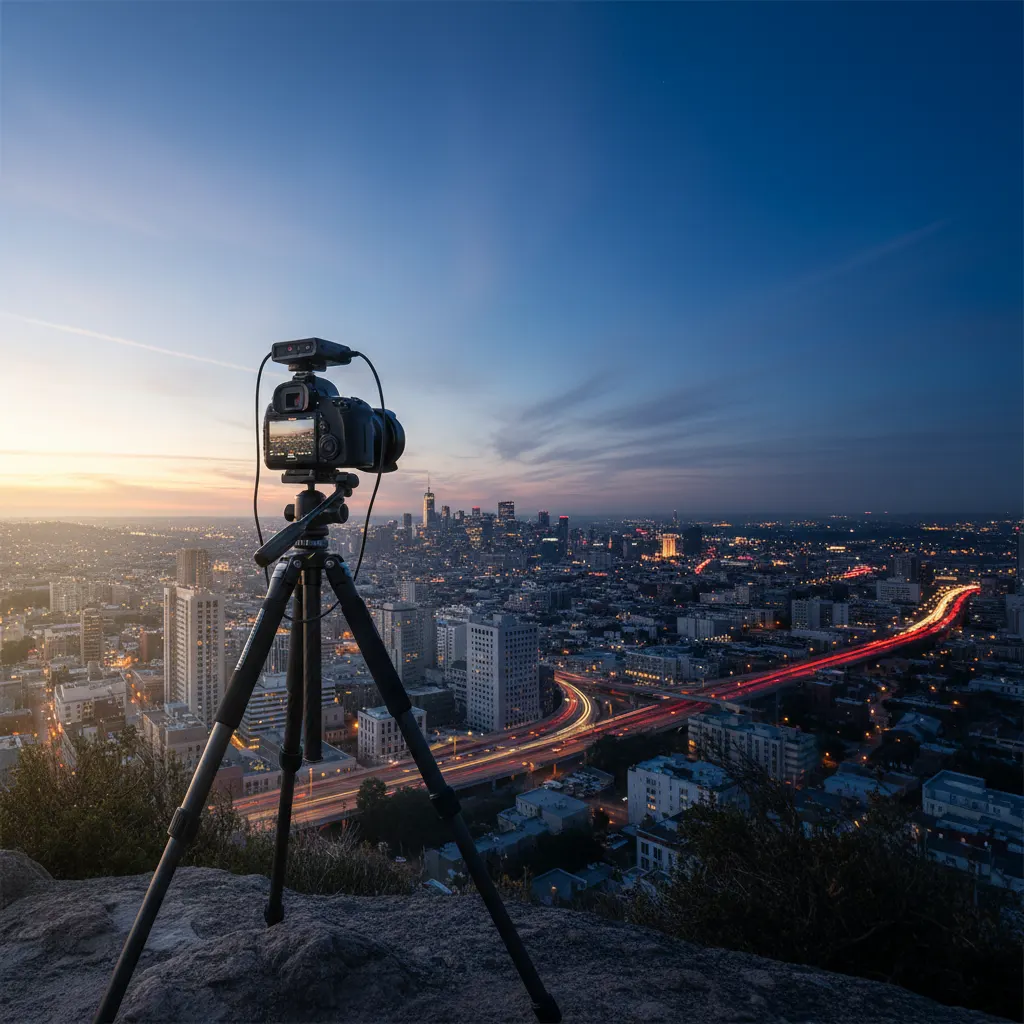
Blue Hour: The Bonus Window
If you stay even later, you can capture stunning sunset photographs as the colors intensify. Immediately before sunrise and after sunset, the sky turns a deep blue. This is blue hour, and it offers its own photographic opportunities — city lights against a blue sky, cool-toned landscapes, and a natural contrast to the preceding warmth of golden hour.
Blue hour is darker, so you will need:
- A tripod
- ISO 400 to 1600
- Shutter speeds of 1 to 10 seconds
Shooting both golden hour and blue hour in a single session gives you a diverse set of images from one outing.
Common Golden Hour Mistakes
Arriving Late
The light changes minute by minute. If you show up right at sunset, you have already missed the best light. Arrive early and start shooting as soon as the quality of light begins to shift.
Using Auto White Balance
Auto white balance corrects for the warm tones — the exact tones you are trying to capture. Set your white balance to Daylight or a manual Kelvin value to preserve that golden color. For a deeper explanation, read our understanding white balance guide. If you shoot RAW, you can fine-tune it later, but getting it close in-camera saves time.
Ignoring the Direction of Light
Not all golden hour light is the same. Light from behind, beside, and in front of your subject each produce different moods. Spend time exploring all three directions rather than shooting everything from one spot. For more on framing and visual structure, see our guide on composition rules every photographer should know.
Overprocessing the Warmth
Golden hour images already have beautiful color. Pushing the saturation or orange tones too far in editing creates an unnatural look. A light touch in post-processing usually produces the best results.
Make It a Habit
The best way to master golden hour photography is to shoot it regularly. The light is different every single day — affected by clouds, humidity, dust, and the season. Set a reminder to get out once a week during the last hour before sunset. Within a month, you will instinctively understand how to read and work with this light.
Frequently Asked Questions
How long does golden hour last?
Golden hour typically lasts 30 to 60 minutes, but the exact duration depends on your latitude and the time of year. Near the equator, golden hour can be as short as 20 minutes because the sun drops steeply below the horizon. In northern latitudes during summer (for example, Scandinavia in June), golden hour can stretch to well over 90 minutes as the sun moves at a shallow angle. Use the PhotoPills app or The Photographer’s Ephemeris to get the precise timing for your location on any given day.
What is the difference between golden hour and magic hour?
The terms are often used interchangeably, but some photographers distinguish them. Golden hour refers specifically to the warm, low-angle sunlight period (sun above the horizon), while magic hour is a broader term that includes the transition period just after golden hour when the sky displays vivid pinks, purples, and oranges even after the sun has dipped below the horizon. In practice, the 15 minutes just before and after the sun crosses the horizon often produce the most dramatic color.
Should I use a lens hood during golden hour?
It depends on your intent. A lens hood blocks stray light and prevents unwanted flare, which improves contrast and color saturation. Use a lens hood when you want clean, flare-free images with the sun at your side or behind you. Remove the lens hood when you are shooting directly into the sun and want to embrace lens flare as a creative element — those warm streaks and soft halos are part of the golden hour aesthetic that many photographers intentionally seek.
You might also like
Time-Lapse Photography Tutorial: From Setup to Final Video
Learn how to create stunning time-lapse videos with the right intervalometer setup, camera settings, post-processing workflow, and gear.
How to Photograph Reflections Creatively
Discover techniques for capturing stunning reflections in water, glass, and puddles, plus how polarizing filters give you creative control.
How to Create Beautiful Bokeh in Your Photos
Master the art of bokeh photography with practical tips on aperture settings, lens choice, distance ratios, and creative light sources.