How to Shoot Long Exposure Photography
Learn long exposure photography techniques, essential equipment, camera settings, and creative ideas to capture stunning motion blur images.
Long exposure photography transforms ordinary scenes into something extraordinary. Waterfalls become silky curtains, car headlights turn into ribbons of light, and clouds streak across the sky like paint strokes. The technique is simpler than it looks, and with the right gear and settings, you can start capturing these images today.
What Is Long Exposure Photography?
Long exposure photography uses a slow shutter speed to capture the movement of objects over time. While a fast shutter speed freezes motion, a slow one records it as a blur. Anything that moves during the exposure — water, clouds, traffic, people — becomes a smooth, flowing element in your frame.
Typical long exposure shutter speeds range from half a second to several minutes, depending on how much movement you want to capture.
Essential Equipment
A Sturdy Tripod
This is non-negotiable. Even the steadiest hands cannot hold a camera still for multiple seconds. Invest in a tripod that can handle your camera’s weight without wobbling — our guide to the best tripods for photography covers options at every budget. Carbon fiber tripods are lighter for travel, but aluminum ones work just as well at a lower price point.
A Remote Shutter Release or Timer
Pressing the shutter button introduces vibration. A wired or wireless remote shutter release eliminates this problem. If you do not have one, use your camera’s built-in 2-second or 10-second self-timer as a free alternative.
Neutral Density (ND) Filters
ND filters are essentially sunglasses for your lens. They reduce the amount of light entering the camera, allowing you to use slower shutter speeds even in bright conditions. Common strengths include:
- ND8 (3-stop) — Good for slightly extending exposures, like smoothing water on overcast days.
- ND64 (6-stop) — Useful for waterfalls and moving water in daylight.
- ND1000 (10-stop) — Ideal for extremely long exposures (30 seconds to several minutes) in broad daylight.
A variable ND filter offers flexibility but can produce an uneven “X” pattern at its strongest setting. Fixed ND filters give more consistent results.
Camera Settings for Long Exposure
Step-by-Step Setup
- Mount your camera on the tripod and compose your shot.
- Switch to Manual mode (M) or Shutter Priority (S/Tv). If you are not comfortable with Manual yet, our guide on how to use manual mode on your camera will help.
- Set your ISO to the lowest native value — typically ISO 100 or ISO 200. Lower ISO means less noise and forces a longer exposure. If you need a refresher on how these settings interact, read our guide to understanding aperture, shutter speed, and ISO.
- Choose your aperture. f/8 to f/11 gives the sharpest results on most lenses. Avoid going beyond f/16, as diffraction softens the image.
- Set your shutter speed. Start with these guidelines:
- Silky water: 1 to 5 seconds
- Streaking clouds: 15 to 60 seconds
- Light trails from cars: 10 to 30 seconds
- Star trails: 20 minutes or longer (or stacked shorter exposures)
- Focus manually. Autofocus can hunt in low light or through ND filters. Switch to manual focus after locking on your subject.
- Turn off image stabilization. On a tripod, stabilization systems can actually introduce micro-vibrations.
Dealing With Bright Conditions
Without an ND filter on a sunny day, even at f/16 and ISO 100, your minimum shutter speed might be 1/125s. That is far too fast for any motion blur. This is where ND filters become essential.
With a 10-stop ND filter, that 1/125s exposure becomes approximately 8 seconds — plenty of time to blur moving water or clouds.
Recommended Camera Settings Table
| Subject | Aperture | Shutter Speed | ISO | ND Filter |
|---|---|---|---|---|
| Silky waterfall (overcast) | f/11 | 1 – 3 seconds | 100 | None or ND8 |
| Silky waterfall (sunny) | f/11 | 1 – 5 seconds | 100 | ND64 (6-stop) |
| Cloud streaks | f/8 | 60 – 120 seconds | 100 | ND1000 (10-stop) |
| Car light trails (dusk) | f/8 | 15 – 30 seconds | 100 | None |
| Ghosting people | f/8 | 2 – 5 seconds | 100 | ND8 (3-stop) |
| Ocean smoothing | f/11 | 15 – 30 seconds | 100 | ND1000 (10-stop) |
| Steel wool spinning | f/8 | 5 – 10 seconds | 100 | None |
These values are starting points. Review the histogram after each shot and adjust. On cameras with base ISO 64, such as the Nikon Z7 II or Nikon D850, you gain an extra two-thirds of a stop of dynamic range, which can reduce your ND filter requirements.
Creative Long Exposure Ideas
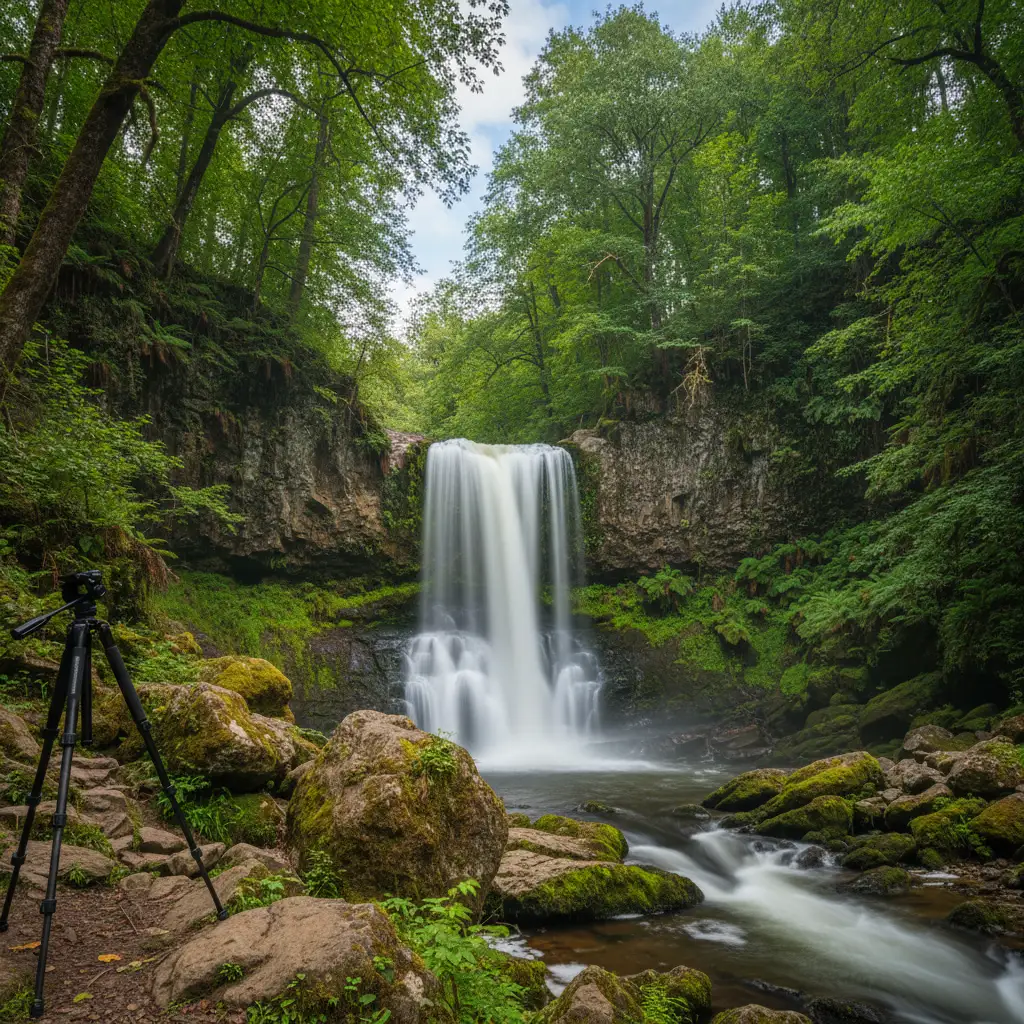
Silky Waterfalls and Rivers
This is the classic long exposure subject. A 1 to 5-second exposure at f/11, ISO 100, turns choppy water into smooth, flowing silk. Visit waterfalls on overcast days when the light is naturally dimmer, reducing the need for heavy ND filters.
Light Trails
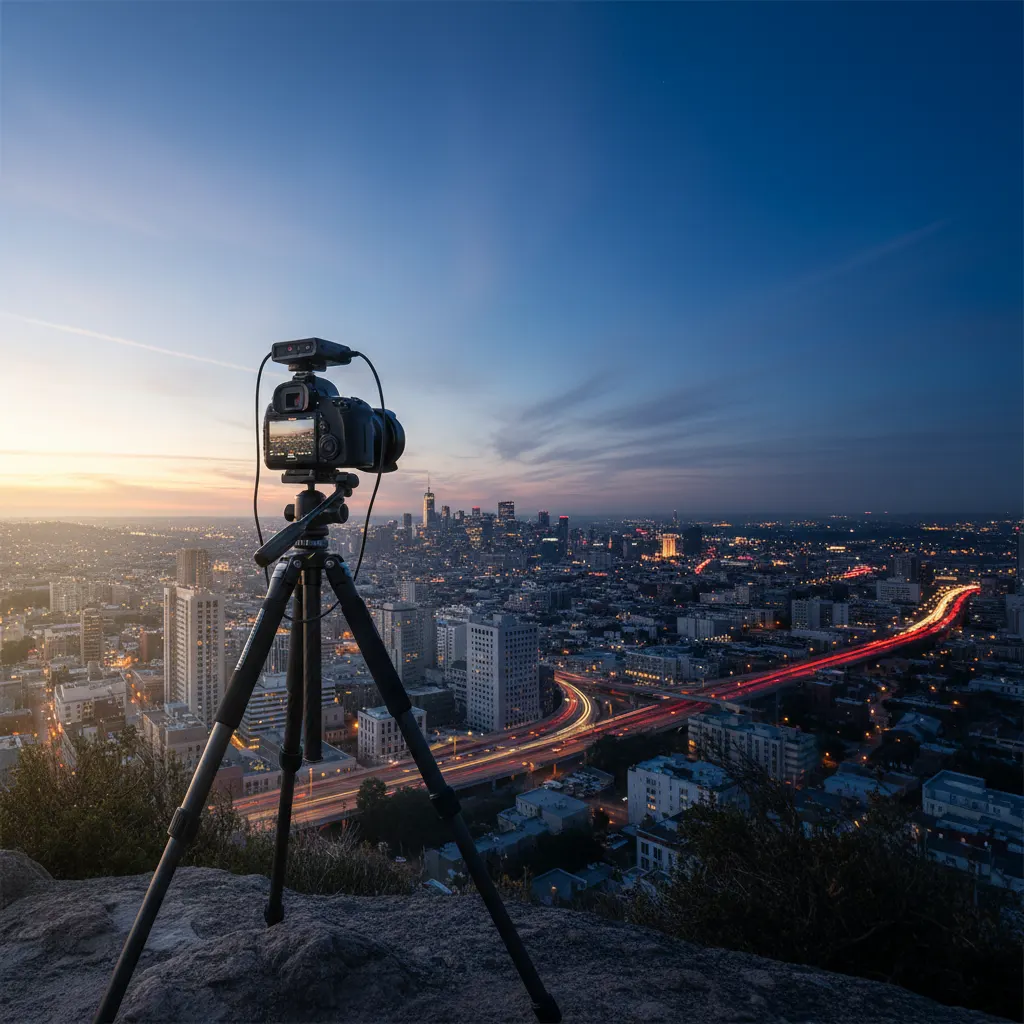
Find an overpass or a busy road at dusk. Set your camera to 15 to 30 seconds at f/8, ISO 100. The headlights and taillights of passing cars will paint red and white lines through your frame. The more traffic, the more trails.
Cloud Streaks
On a windy day, attach a 10-stop ND filter and shoot at 60 to 120 seconds. Moving clouds will streak dramatically across the sky while buildings and landscapes remain sharp. This creates a powerful contrast between stillness and motion.
Ghost People
In a busy public space, a 2 to 5-second exposure will turn pedestrians into transparent ghosts. Anyone standing still long enough will appear solid, while people walking through the frame become faint blurs. This works well in train stations and city squares.
Steel Wool Spinning
Place burning steel wool inside a whisk attached to a string. Spin it while a friend holds the camera open for 5 to 10 seconds. The sparks create dramatic, fiery orbs. Always do this in a safe location away from flammable materials.
Common Problems and Solutions
Overexposure
If your image is too bright, you need to reduce light. Use a stronger ND filter, narrow your aperture, or wait for dimmer conditions. Never increase ISO to solve overexposure — that works against you.
Soft Images
Check three things: Is your tripod stable on solid ground? Did you use a remote release or timer? Is image stabilization turned off? Also verify your aperture is not too narrow — f/16 and beyond causes diffraction blur on most cameras.
Color Cast From ND Filters
Cheap ND filters often add a brown or magenta tint to images. Shoot in RAW format so you can correct the white balance in post-processing without any quality loss — see our guide on RAW vs JPEG and when to use each for more on why RAW matters. Higher-quality glass ND filters from brands like Hoya, B+W, or NiSi produce more neutral results.
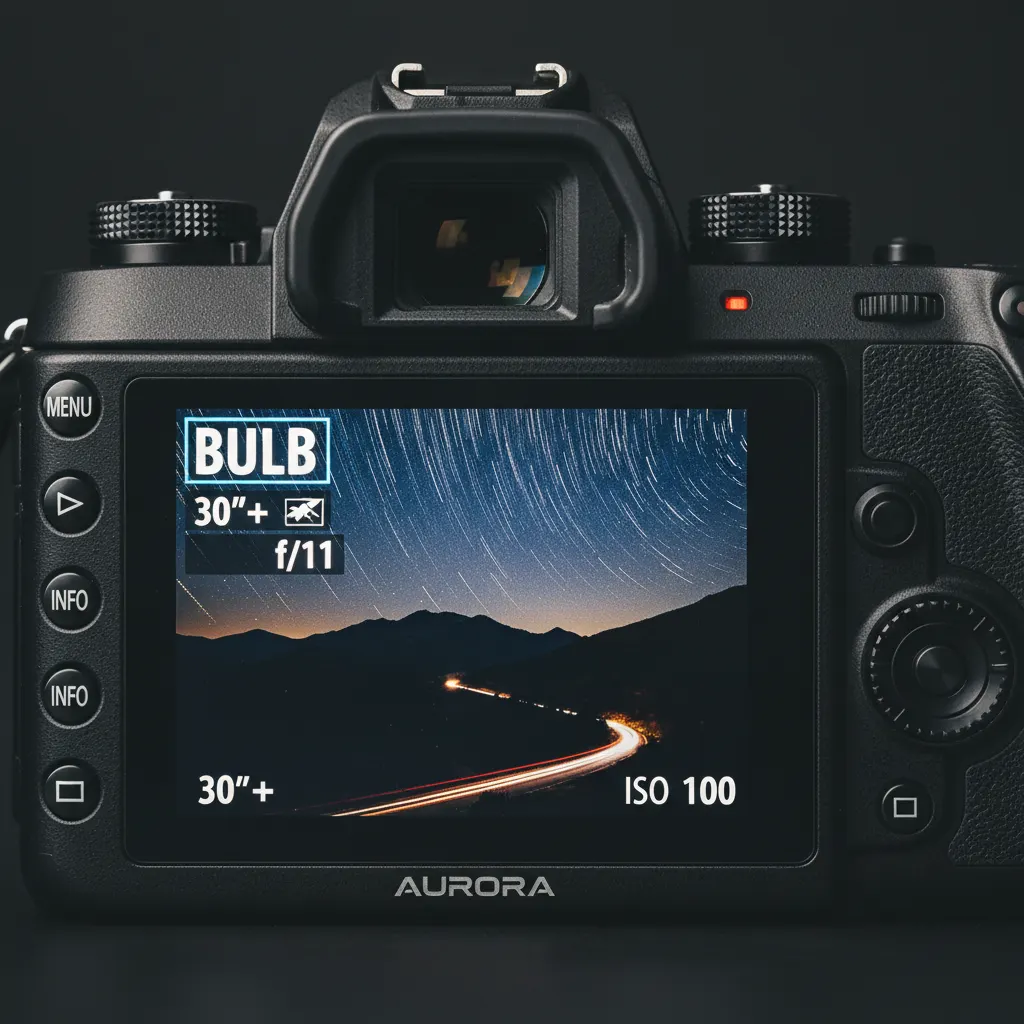
Bulb Mode for Exposures Beyond 30 Seconds
Most cameras cap their shutter speed at 30 seconds. For longer exposures, switch to Bulb mode (B). In Bulb mode, the shutter stays open as long as you hold the button — which is why a remote release with a lock function is critical for multi-minute exposures.
Post-Processing Tips
Long exposure images often benefit from minor adjustments in editing software:
- Increase contrast to compensate for the slightly flat look that long exposures can produce.
- Adjust white balance if your ND filter introduced a color cast.
- Apply noise reduction selectively. Exposures longer than 30 seconds can produce hot pixels and thermal noise. Many cameras have a built-in Long Exposure Noise Reduction setting that takes a second “dark frame” to subtract noise, though it doubles your shooting time.
- Boost clarity or texture to bring out detail in static elements like rocks or buildings.
Recommended Gear for Long Exposure Photography
Choosing the right equipment makes a significant difference in long exposure results. Here are specific products trusted by experienced photographers:
- Tripod: Manfrotto MT055CXPRO4 carbon fiber tripod paired with a 054 ball head. At 2.1 kg, it is light enough for hiking yet rigid enough to eliminate vibration during multi-minute exposures. For a budget option, the Benro Mach3 TMA28C delivers comparable stability at roughly half the price.
- ND Filters: The NiSi 100mm V6 filter system is a top choice for landscape photographers. Its 10-stop ND1000 filter produces minimal color cast compared to cheaper alternatives. For screw-on filters, the Hoya ProND1000 and B+W 110 ND are both excellent. Avoid no-name filters — their uneven coating creates hot spots and heavy color shifts.
- Remote Shutter Release: The Pixel TW-283 wireless timer remote works with Canon, Nikon, and Sony bodies and includes an intervalometer for time-lapse sequences. It costs under $30 and is far more versatile than a basic cable release.
- Camera Bodies: Any modern mirrorless or DSLR handles long exposure well. The Sony A7 IV, Canon EOS R6 Mark II, and Nikon Z6 III all feature excellent dynamic range at base ISO, which is the most important sensor characteristic for long exposure work. According to DxOMark, the Nikon Z6 III achieves 14.4 stops of dynamic range at its base ISO of 100, making it especially forgiving for recovering highlight and shadow detail in post-processing.
Real-World Tips From the Field
Experienced long exposure photographers learn a few lessons that tutorials rarely mention. First, always cover the viewfinder on DSLRs during exposures longer than 10 seconds — light leaking through the optical viewfinder can create a subtle fogging across the frame. Most DSLRs include a small eyepiece cover on the camera strap for this purpose. Mirrorless cameras do not have this problem because the viewfinder is electronic.
Second, shoot in overcast or twilight conditions whenever possible. The soft, diffused light of an overcast sky eliminates the need for heavy ND filtration and produces more even exposures. Many of the most iconic long exposure waterfall images were shot on grey, drizzly days.
Third, use your camera’s built-in Long Exposure Noise Reduction carefully. This feature takes a “dark frame” after each exposure and subtracts sensor noise, but it doubles your shooting time — a 60-second exposure becomes a 120-second wait. During golden hour when light changes fast, this delay can cost you the shot. A practical alternative is to take one dark frame manually at the end of your session (lens cap on, same exposure length) and subtract it in post.
Final Advice
Start with moving water — it is the most forgiving and rewarding long exposure subject. You can see results with shutter speeds as short as 1/2 second, which means you may not even need an ND filter on a cloudy day. As you build confidence, experiment with longer exposures, light painting, and night sky photography. The key is patience and a willingness to experiment with different exposure times until you find the look you want. Once you’re comfortable with long exposures, try applying the same techniques to create a time-lapse photography sequence — the skills transfer directly.
Frequently Asked Questions
What ND filter strength do I need for long exposure photography?
For daytime long exposures of 1 to 5 seconds (silky waterfalls, smooth rivers), a 6-stop ND64 filter is usually sufficient. For exposures of 30 seconds or longer in daylight (cloud streaks, ocean smoothing), you need a 10-stop ND1000 filter. On overcast days or during twilight, a 3-stop ND8 filter — or no filter at all — may be enough. Start with a single 10-stop ND filter, as it covers the widest range of creative situations.
Can I shoot long exposures with a smartphone?
Yes, but with limitations. Many modern smartphones include a “Pro” or “Manual” mode that allows shutter speeds up to 30 seconds. The Google Pixel 9 Pro and Samsung Galaxy S24 Ultra both support manual shutter speeds. However, smartphone sensors are much smaller than dedicated camera sensors, which means more noise in long exposures. A phone tripod mount is essential, and results work best in low-light conditions where you do not need an ND filter.
Why are my long exposure photos blurry even on a tripod?
The most common causes are wind vibration, mirror slap on DSLRs, or touching the camera to trigger the shutter. Use a remote release or a 2-second self-timer. On DSLRs, enable mirror lock-up or exposure delay mode. Ensure the tripod legs are fully locked and avoid extending the center column, which reduces stability. On windy days, hang your camera bag from the center column hook to add weight and dampen vibration.
You might also like
Time-Lapse Photography Tutorial: From Setup to Final Video
Learn how to create stunning time-lapse videos with the right intervalometer setup, camera settings, post-processing workflow, and gear.
How to Photograph Pets and Animals Like a Pro
Get sharp, expressive pet photos with tips on eye-level shooting, burst mode, lighting, action shots, and patience techniques.
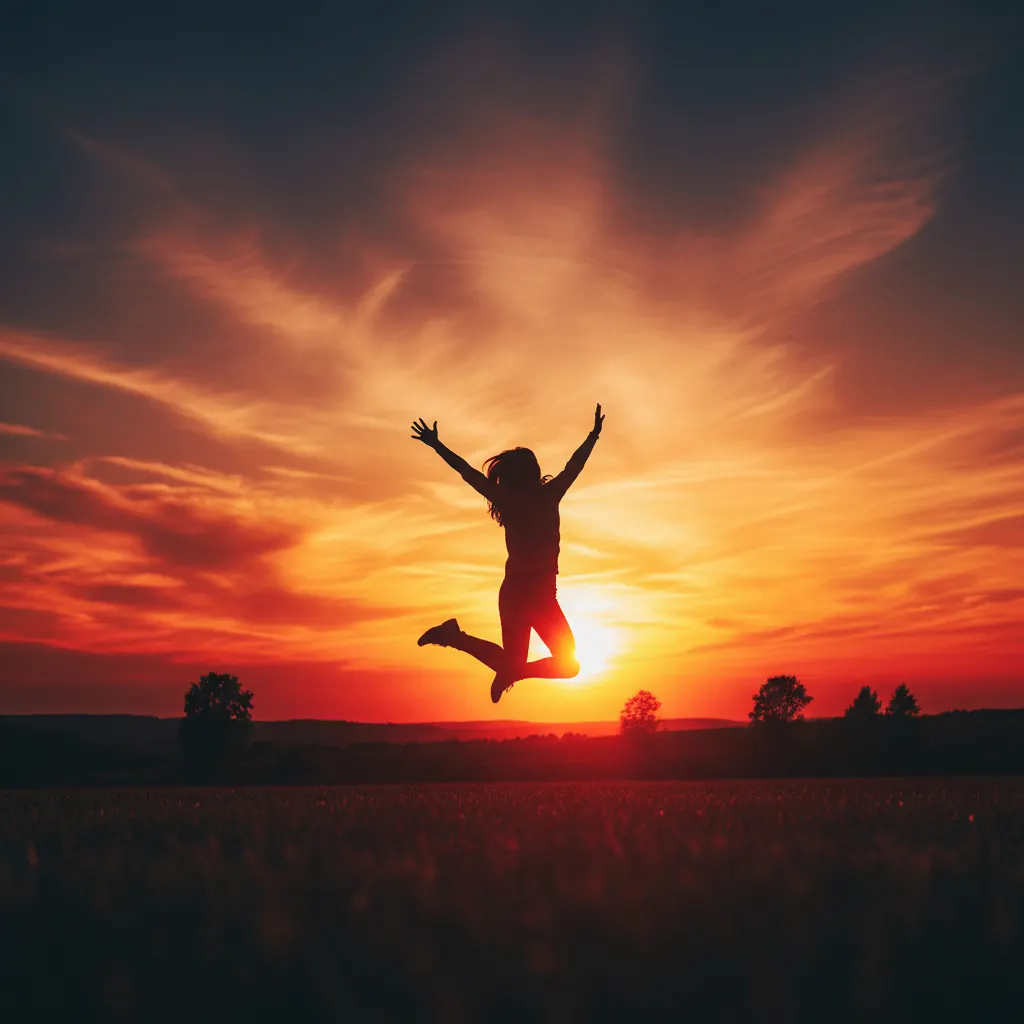
How to Shoot Silhouettes: A Step-by-Step Guide
Master silhouette photography with backlighting techniques, exposure metering tips, subject selection, and creative composition ideas.