How to Photograph Sunsets Like a Pro
Capture stunning sunset photos with the right exposure settings, silhouette techniques, graduated filters, and HDR methods.
Sunsets are one of the most photographed subjects in the world, yet they are surprisingly difficult to capture well. The dynamic range is extreme, colors shift rapidly, and your camera’s automatic settings often produce results that look nothing like what you saw with your eyes.
This guide walks you through the techniques and settings that consistently produce stunning sunset images.
Timing Is Everything
The best sunset photos are rarely taken at the exact moment the sun dips below the horizon. The most dramatic light and color often occur in three distinct phases.
30 minutes before sunset: The sun is low but still above the horizon. Light is warm and directional. Great for landscapes where you want detail in both the sky and foreground. This period overlaps with what photographers call golden hour — learn how to make the most of it in our guide on mastering golden hour photography.
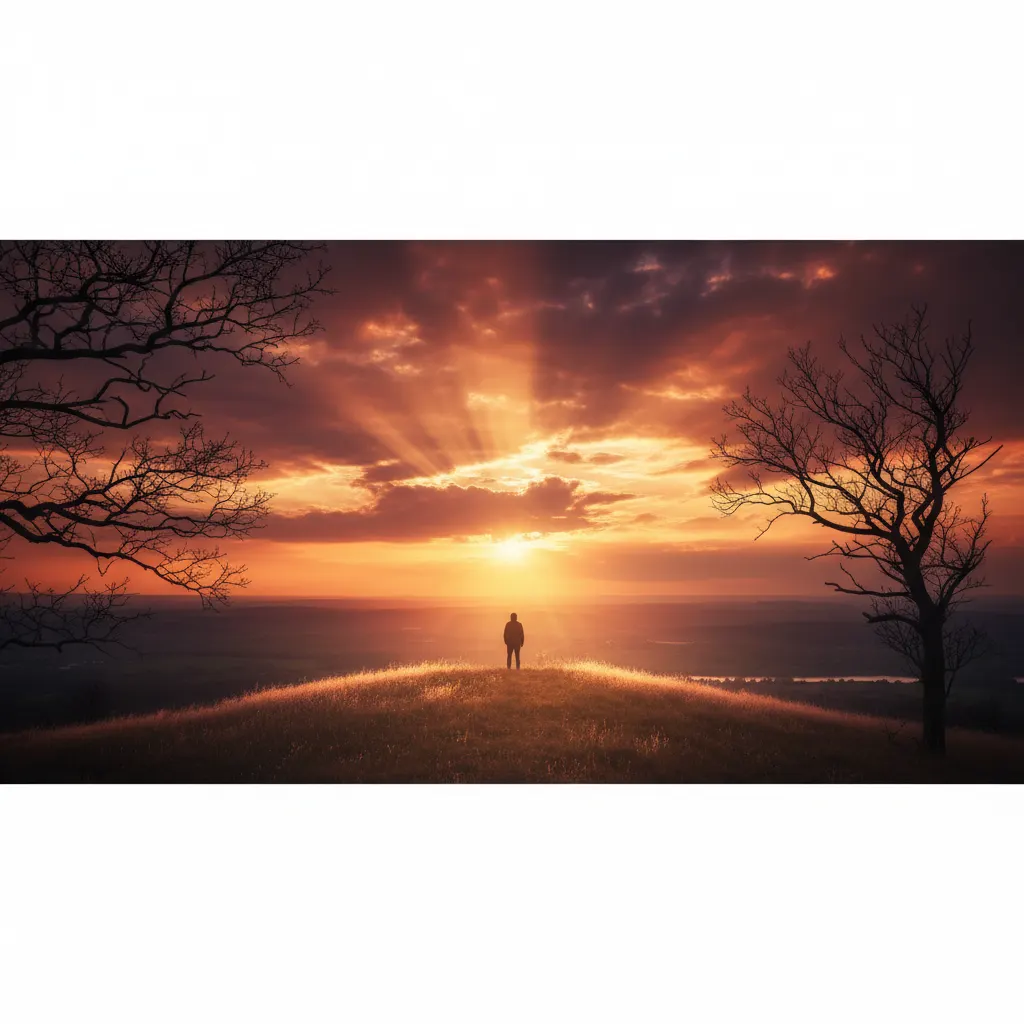
At sunset: Maximum drama in the sky, but the foreground goes very dark. This is prime time for silhouettes.
15 to 30 minutes after sunset: The afterglow. The sun is gone, but the sky often explodes with deep pinks, purples, and magentas. Many photographers pack up too early and miss the best colors.
Use a sunrise/sunset app like PhotoPills or The Photographer’s Ephemeris to plan the exact position and timing for your location.
Camera Settings for Sunsets
Shooting Mode
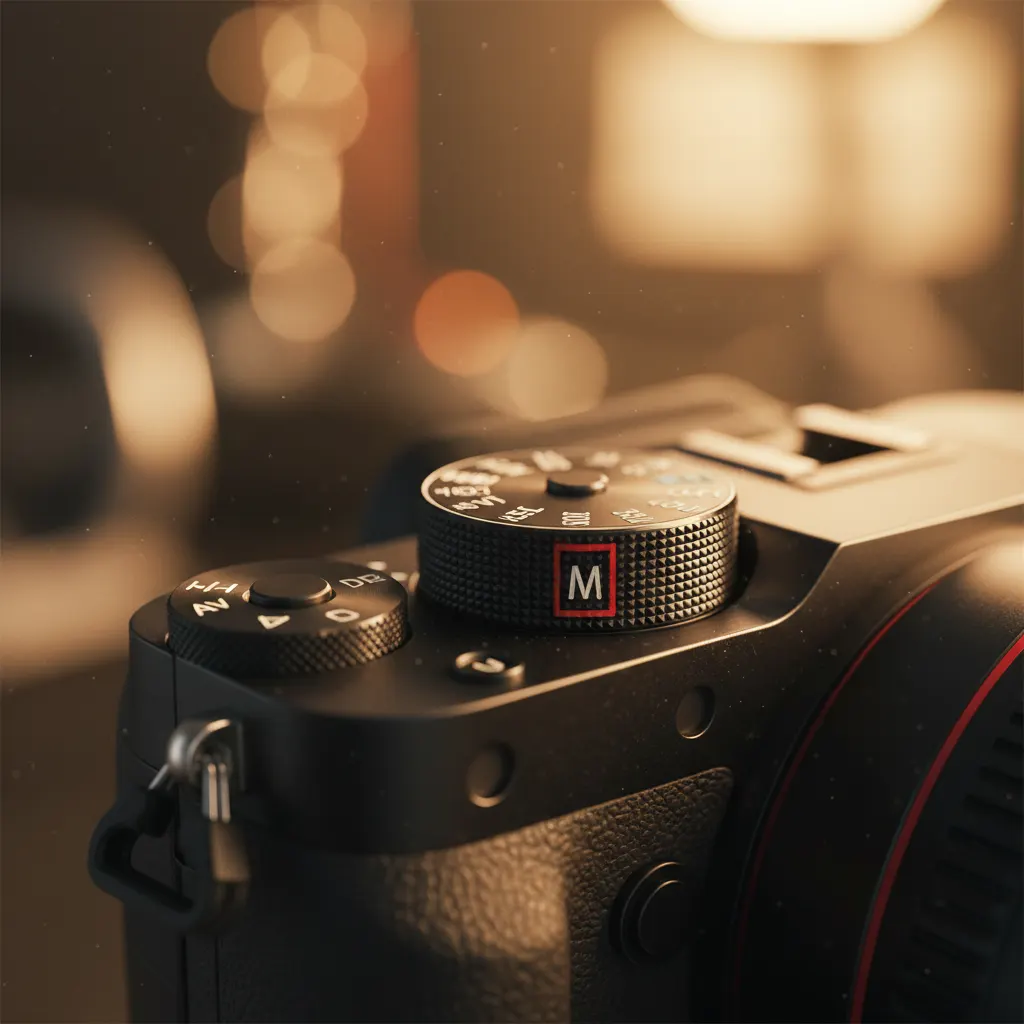
Use Manual mode or Aperture Priority. Sunset light changes rapidly, so you need to adjust exposure frequently. In Aperture Priority, use exposure compensation to fine-tune brightness.
Aperture
For landscape sunsets with front-to-back sharpness, shoot between f/8 and f/11. This puts you in most lenses’ sweet spot while providing generous depth of field.
If you want a starburst effect from the sun, stop down to f/16 or f/22. The narrow aperture turns the sun into a pointed star shape. This works best when the sun is partially obscured by a building, tree, or the horizon line.
Shutter Speed
Shutter speed varies with the conditions. Bright pre-sunset scenes might need 1/250s, while deep twilight could require several seconds on a tripod. If you are including water, a shutter speed of 1 to 5 seconds creates a smooth, glassy surface effect.
ISO
Start at ISO 100 for the cleanest files. Only raise ISO if you are shooting handheld and need a faster shutter speed. On a tripod, there is no reason to go above ISO 100.
White Balance
Auto white balance often desaturates sunset colors because it tries to neutralize the warm tones. Switch to Daylight (5,500K) or set a manual Kelvin value between 5,500K and 7,000K. Higher values enhance the warm tones. For a deeper dive into color temperature and how Kelvin values affect your images, read our complete guide to understanding white balance. Experiment to find the balance between vivid and natural.
Metering for Sunset Exposures
Your camera’s meter will struggle with sunsets because the scene has extreme brightness variations. Here are three approaches that work.
Meter the Sky, Not the Foreground
Point your camera at the brightest part of the sky (but not directly at the sun) and take a meter reading. Use that exposure for your shot. The sky will be correctly exposed while the foreground goes dark. This is the simplest approach and produces natural-looking results.
Bracket Your Exposures
Take three or five shots at different exposures: one at the meter reading, one or two stops under, and one or two stops over. You can choose the best single frame later or merge them into an HDR image.
Use Spot Metering
Switch to spot metering and meter on a midtone area of the sky, such as a cloud that is neither the brightest nor darkest part of the scene. This gives a balanced starting point.
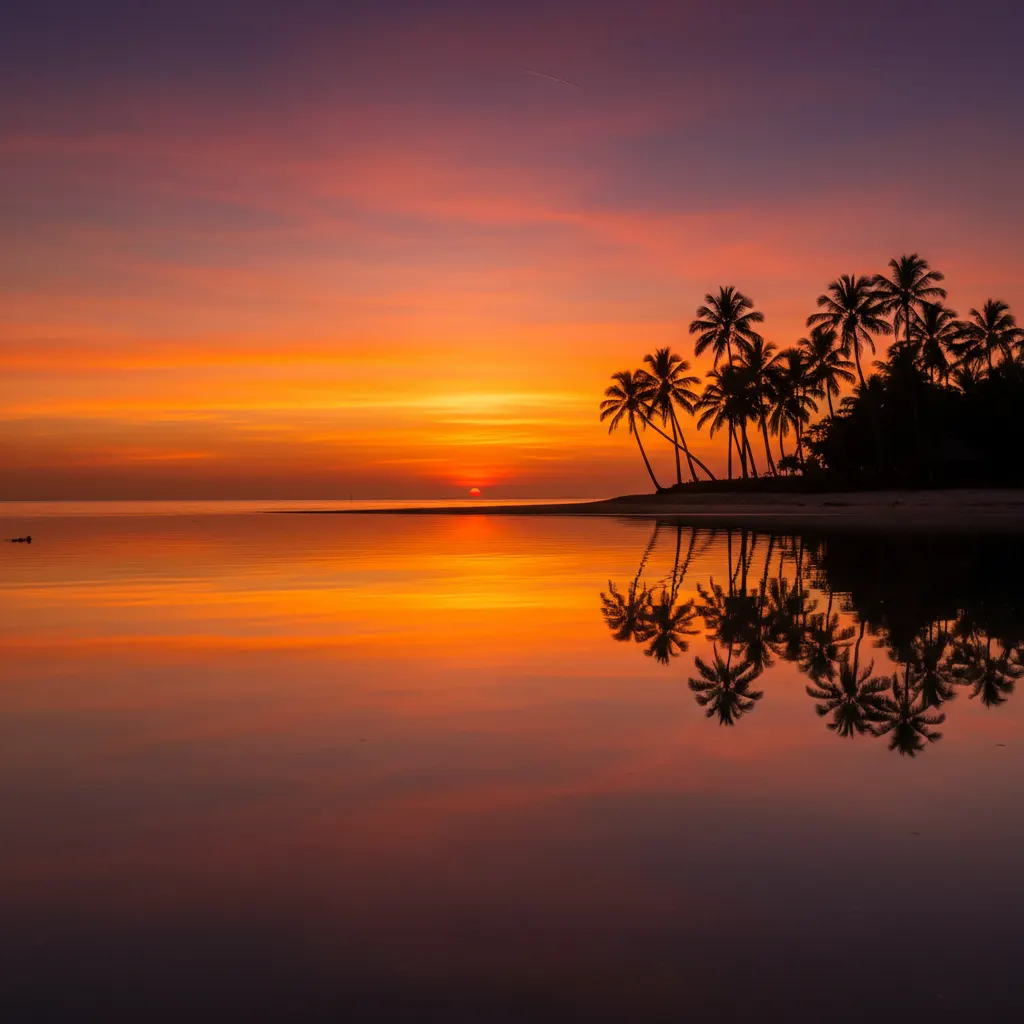
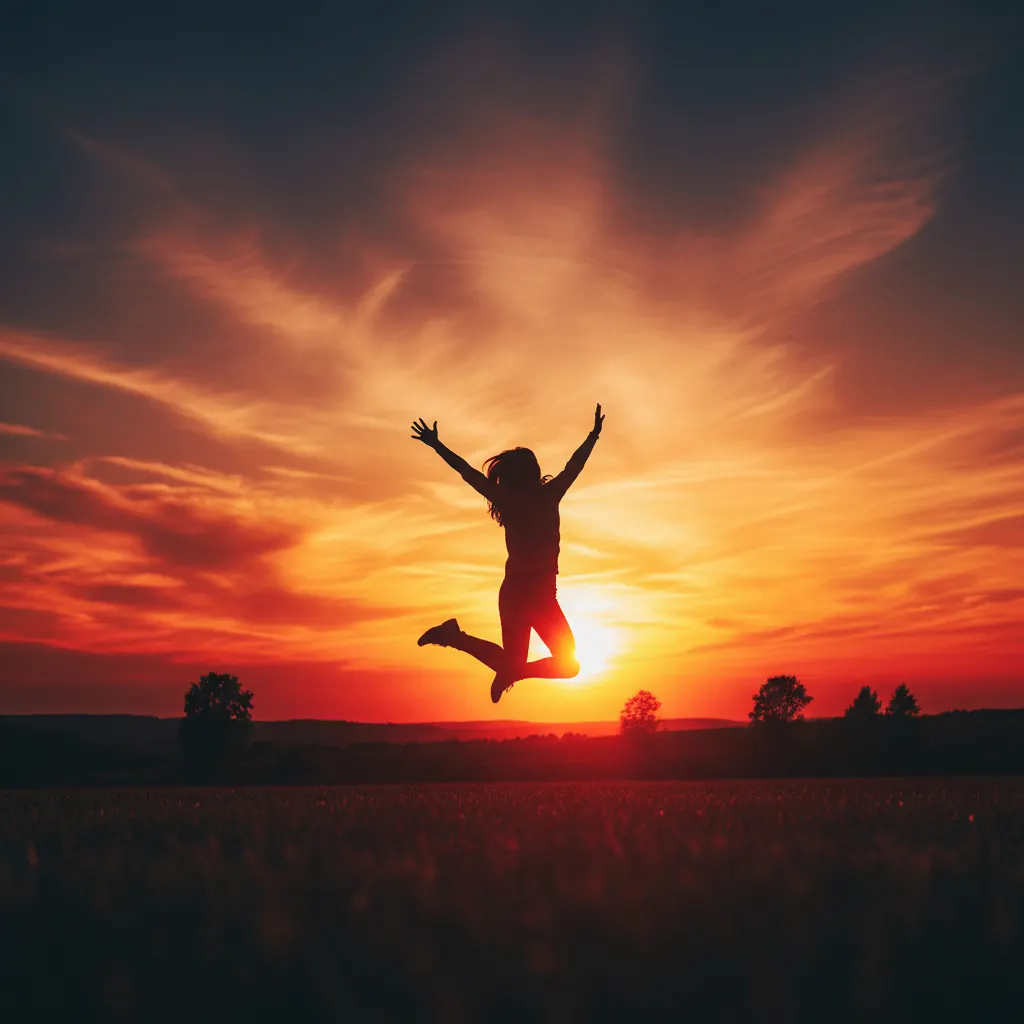
Creating Silhouettes
Silhouettes are one of the most powerful compositional tools for sunset photography. For a complete walkthrough of this technique, see our dedicated guide on how to shoot silhouettes. A dark, recognizable shape against a vivid sky creates instant visual impact.
How to Shoot Silhouettes
- Position your subject between the camera and the setting sun.
- Meter for the sky. The subject will naturally go dark.
- If the subject is not dark enough, reduce exposure by 1 to 2 stops using exposure compensation.
- Choose subjects with clear, recognizable outlines: people, trees, buildings, animals, boats.
- Avoid overlapping silhouette elements. Each shape should be distinct and separated.
The best silhouette subjects have interesting edges and profiles. A person with arms akimbo or holding a hat works better than someone standing straight with arms at their sides.
Using Graduated Neutral Density Filters
The fundamental challenge of sunset photography is dynamic range: the sky is much brighter than the foreground. Graduated neutral density (GND) filters darken the top half of the image while leaving the bottom half unaffected, balancing the exposure.
Types of GND Filters
- Hard-edge GND: Sharp transition from dark to clear. Best for flat horizons like ocean scenes.
- Soft-edge GND: Gradual transition. Better for uneven horizons with mountains, buildings, or trees.
- Reverse GND: Darkest at the center and lighter toward the top. Designed specifically for sunsets where the brightest area is at the horizon.
A 2-stop or 3-stop GND filter handles most sunset situations. Rectangular filters with a holder system give you the flexibility to position the transition line precisely on the horizon.
HDR Technique for Sunsets
High dynamic range (HDR) processing combines multiple exposures to capture detail in both the bright sky and dark foreground.
HDR Workflow
- Mount your camera on a tripod.
- Set your camera to bracket mode: 3 to 5 frames, 2 stops apart.
- Use a remote shutter release or timer to avoid camera movement.
- Merge the exposures in Lightroom, Photomatix, or Aurora HDR.
- Process with a light hand. Subtle HDR looks natural and compelling. Overcooked HDR looks artificial.
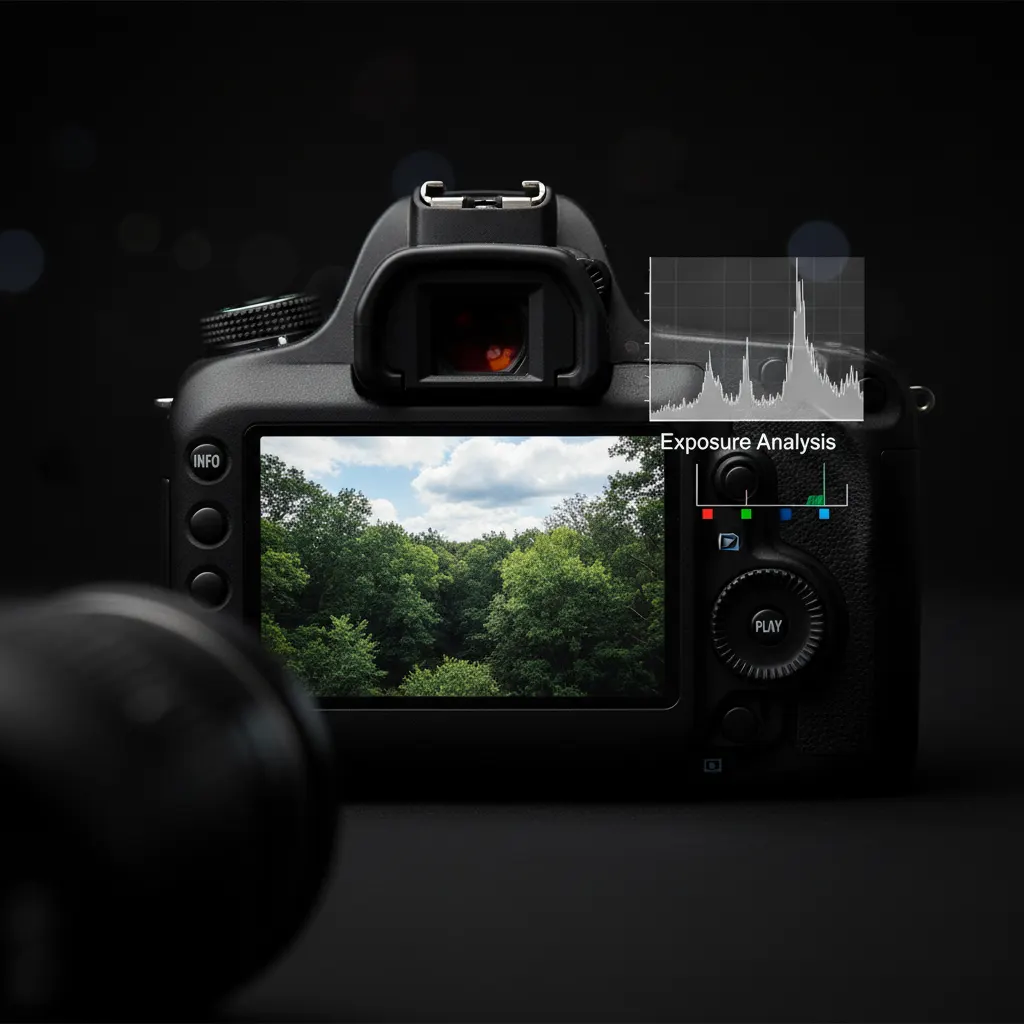
Modern cameras with excellent dynamic range (14+ stops) can often recover enough shadow and highlight detail from a single RAW file to rival HDR. Knowing how to use the histogram helps you judge exactly how much headroom you have before clipping occurs. Try pulling shadows up and highlights down in your RAW processor before resorting to multi-frame HDR.
Composition Tips for Sunset Photos
A beautiful sky alone does not make a compelling photo. You need a strong composition to anchor the image. Brushing up on the composition rules every photographer should know will help you frame sunset scenes with more impact.
Include Foreground Interest
Rocks, flowers, leading lines, water, piers, or pathways give the viewer’s eye somewhere to land before moving up to the sky. The foreground tells a story while the sky provides the backdrop.
Use the Rule of Thirds
Place the horizon on the lower third line if the sky is dramatic. Place it on the upper third line if you have compelling foreground elements. Avoid placing the horizon dead center unless symmetry (like a perfect reflection) justifies it.
Look Behind You
While everyone faces the sunset, the warm light illuminates everything behind you in gorgeous golden tones. Turn around and check what the sunset light is doing to the landscape, buildings, or mountains at your back. Some of the best golden hour shots face away from the sun.
Shoot Vertical
Sunset photos are almost always horizontal. Switching to vertical orientation can create a more dynamic composition, especially when you have strong foreground leading lines or tall clouds.
Gear Recommendations
- Wide-angle lens (16-35mm): For expansive sky and foreground compositions.
- Telephoto lens (70-200mm): For compressing the sun against distant subjects, making it appear larger.
- Sturdy tripod: Essential for longer exposures during twilight. See our guide to the best tripods for photography for recommendations.
- GND filters: 2-stop and 3-stop soft-edge covers most situations.
- Lens cloth: Humidity and sea spray are common at sunset locations.
Recommended Camera Settings Table
Here are specific settings for common sunset photography scenarios:
| Scenario | Aperture | Shutter Speed | ISO | White Balance | Filter |
|---|---|---|---|---|---|
| Landscape with foreground detail | f/8 – f/11 | 1/30s – 1/125s | 100 | Daylight (5,500K) or 6,000K | 2-stop soft GND |
| Silhouette against bright sky | f/8 – f/11 | 1/250s – 1/500s | 100 | 6,000K – 7,000K | None |
| Sun starburst on horizon | f/16 – f/22 | 1/60s – 1/250s | 100 | Daylight (5,500K) | None |
| Smooth water reflection | f/8 – f/11 | 1s – 5s (tripod) | 100 | 6,500K | 6-stop ND + 2-stop soft GND |
| Twilight afterglow (15 min post-sunset) | f/8 | 2s – 15s (tripod) | 100 – 400 | 5,500K – 6,500K | None |
| Telephoto compressed sun | f/8 – f/11 | 1/500s – 1/1000s | 100 – 200 | Daylight (5,500K) | None |
Real-World Tips from Experienced Photographers
Scout your location in advance. Professional landscape photographers like Thomas Heaton and Marc Adamus visit their sunset locations days or even weeks before the actual shoot. Use apps like PhotoPills or TPE (The Photographer’s Ephemeris) to check exactly where the sun will set relative to your foreground elements. A difference of even a few meters in your position can determine whether the sun sets behind a mountain peak or beside it.
Shoot continuously as the light changes. Sunset light shifts dramatically minute by minute. Do not take a few frames and stop. Shoot continuously from 30 minutes before sunset to 30 minutes after. The best frame is often not the one you expected. Some of the most dramatic color explosions happen 10 to 20 minutes after the sun disappears, when high clouds catch indirect light and glow in deep pinks and magentas. Cameras with high burst buffers like the Sony A7R V or Canon R5 Mark II let you shoot multiple compositions without waiting.
Underexpose by half a stop for richer colors. Sunset skies often look washed out at the camera’s metered exposure. Dialing in -0.5 to -1.0 exposure compensation (or reducing shutter speed by one stop in manual mode) deepens the oranges, reds, and purples. Review your histogram to ensure you are not clipping shadow detail. You can always lift shadows in post-processing, but overexposed highlights with lost color information cannot be recovered.
Include a strong foreground anchor. The most common beginner mistake in sunset photography is pointing the camera at the sky and ignoring the lower third of the frame. A dramatic sky needs a compelling foreground to create a complete image. Rocks, piers, leading lines in sand, boats, or even a person in silhouette give the viewer an entry point. The foreground tells the story; the sky provides the emotion.
Post-Processing Tips
- Boost vibrance rather than saturation for more natural color enhancement.
- Use the HSL panel to selectively intensify oranges, reds, and magentas.
- Add a slight vignette to draw attention toward the center.
- Increase clarity or texture moderately to enhance cloud detail.
- Do not push colors to the point of unreality. If it looks like a painting, you have gone too far.
Sunset photography rewards patience and persistence. Arrive early, stay late, and shoot continuously as the light changes. The difference between a good sunset photo and an extraordinary one often comes down to being there for those fleeting thirty seconds when everything aligns.
Frequently Asked Questions
What are the best camera settings for sunset photography? For most sunset landscapes, start with f/8 to f/11, ISO 100, and a shutter speed between 1/30s and 1/125s, adjusting as the light fades. Set white balance to Daylight (5,500K) or slightly warmer at 6,000K to 7,000K to enhance the golden tones. Use a tripod if your shutter speed drops below 1/60s. For silhouettes, meter the bright sky and let the foreground go dark. For smooth water effects, use a 6-stop ND filter to extend the shutter speed to 1 to 5 seconds.
Why do my sunset photos look washed out compared to what I see? Your camera’s automatic metering and auto white balance both work against sunset photography. The meter tries to average the extreme brightness range, often overexposing the sky and washing out colors. Auto white balance detects the warm light and adds blue to “correct” it, removing the very tones that make the sunset beautiful. Fix this by shooting in manual or aperture priority with -0.5 to -1 exposure compensation, and set white balance manually to Daylight or a Kelvin value of 5,500K to 7,000K. Shooting in RAW format gives you full control to recover and enhance colors in post-processing.
Do I need filters for sunset photography? Graduated neutral density (GND) filters are the most useful accessory for sunset photography. A 2-stop or 3-stop soft-edge GND balances the bright sky with the darker foreground, letting you capture detail in both without HDR processing. A reverse GND is specifically designed for sunsets where the brightest area is at the horizon. While modern cameras with 14+ stops of dynamic range can often recover enough detail from a single RAW file, filters produce a more natural result with less noise in the shadow areas. Brands like NiSi, Lee Filters, and Haida offer quality GND systems starting around $80 for a single filter.
You might also like
How to Shoot Silhouettes: A Step-by-Step Guide
Master silhouette photography with backlighting techniques, exposure metering tips, subject selection, and creative composition ideas.
How to Use the Histogram in Photography
Master histogram reading to nail exposure every time. Learn about clipping warnings, expose to the right, and practical histogram use in the field.
How to Use Manual Mode on Your Camera
Understand manual mode with clear explanations of aperture, shutter speed, and ISO, plus practice exercises to build confidence.