How to Use the Histogram in Photography
Master histogram reading to nail exposure every time. Learn about clipping warnings, expose to the right, and practical histogram use in the field.
Learning how to use the histogram in photography is one of the fastest ways to improve your exposure accuracy. The histogram is the most reliable exposure tool on your camera, yet many photographers ignore it entirely. They rely on the LCD preview instead, which is misleading because screen brightness, ambient light, and viewing angle all affect how the image appears on the back of the camera.
The histogram does not lie. It is a mathematical representation of the tonal values in your image, and learning to read it takes about ten minutes. Those ten minutes will permanently improve your exposure accuracy.
What Is a Histogram?
A histogram is a graph that shows the distribution of brightness values in your image. The horizontal axis represents brightness, from pure black on the left to pure white on the right. The vertical axis represents how many pixels exist at each brightness level.
Think of it as a bar chart of your image’s tones:
- Left side: Shadows and dark tones
- Center: Midtones
- Right side: Highlights and bright tones
- Far left edge: Pure black (0)
- Far right edge: Pure white (255)
The shape of the histogram tells you how your tones are distributed. A peak on the left means lots of dark pixels. A peak on the right means lots of bright pixels. A spread across the full range means a wide variety of tones.
How to Display the Histogram
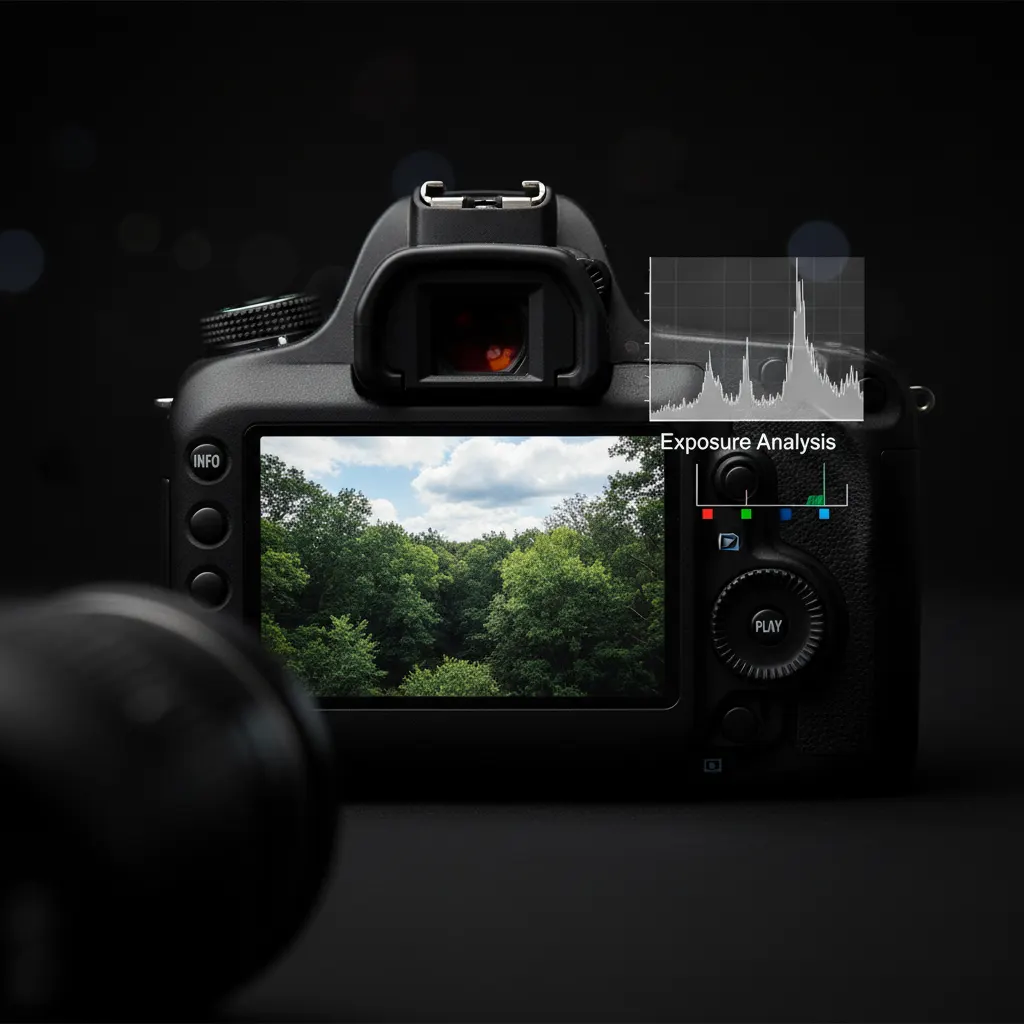
During Playback
After taking a photo, press the info or display button while reviewing the image. Most cameras cycle through several display modes, one of which includes the histogram. On some cameras, you can set the default playback view to always show the histogram.
Live View / Electronic Viewfinder
Mirrorless cameras and DSLRs in live view can display a real-time histogram that updates as you change settings. This is extremely useful because you can see the exposure change before taking the shot.
Enable it through your camera’s display settings menu. On Sony cameras, look for “Display All Info.” On Canon mirrorless, it is under “Shooting info display.” On Nikon Z, check “Custom monitor/viewfinder display.”
Reading Common Histogram Shapes
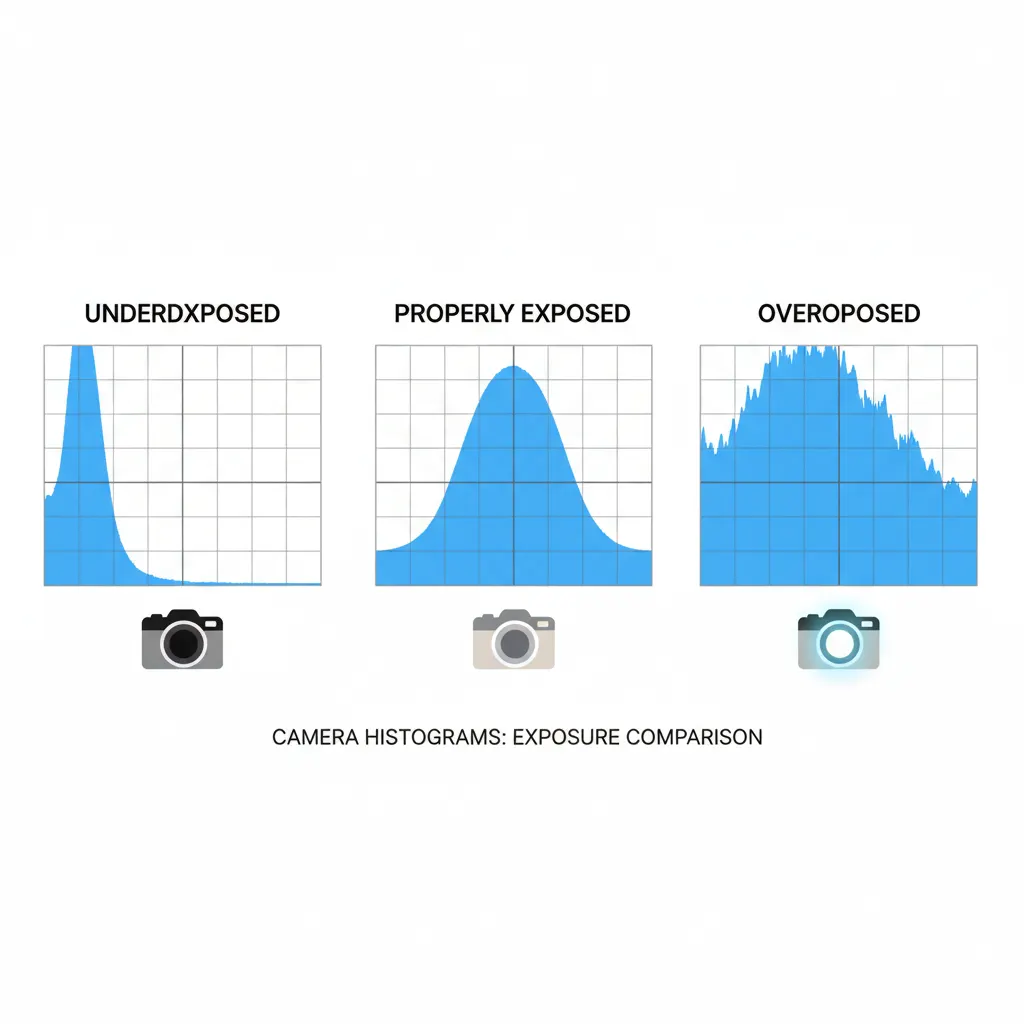
Well-Exposed Image
A well-exposed histogram uses the full tonal range without slamming into either edge. The data spreads from near the left to near the right, with peaks wherever the dominant tones are. There is a small gap between the data and both edges, meaning no clipping.
Underexposed Image
The data is bunched toward the left side with a gap on the right. This means you have lots of dark tones and no bright tones. The image will look muddy and dark. Solution: increase exposure by opening the aperture, slowing the shutter speed, or raising ISO. If these terms are unclear, our guide on understanding aperture, shutter speed, and ISO explains how each one affects exposure.
Overexposed Image
The data is bunched toward the right side with a gap on the left. If the data hits the right wall and climbs up it, highlights are clipped, meaning detail is permanently lost in the brightest areas. Solution: decrease exposure.
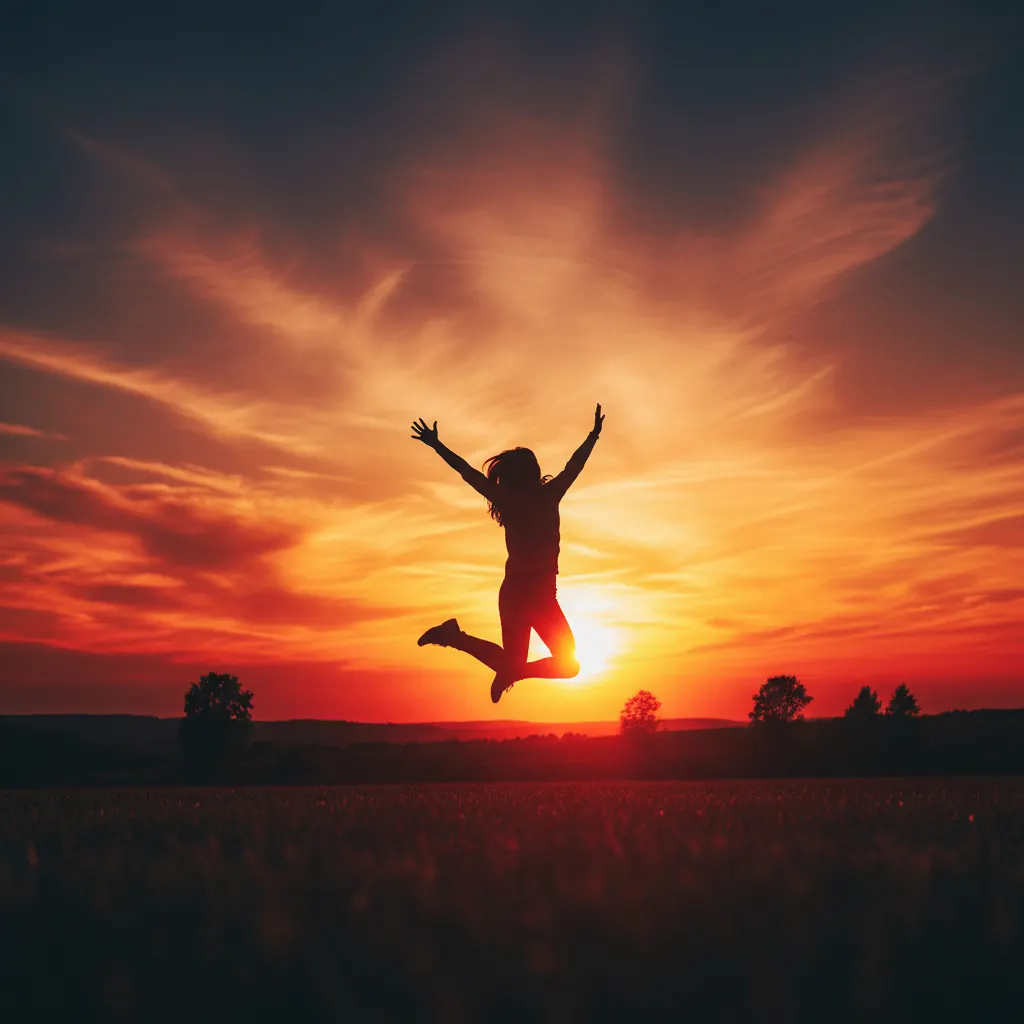
High-Contrast Scene
The histogram shows peaks on both the far left and far right with a valley in the middle. This bimodal distribution indicates a scene with very dark and very bright areas but few midtones. Sunsets, backlit subjects, and scenes mixing indoor and outdoor light often produce this pattern. Our guide on how to photograph sunsets explains how to handle the extreme dynamic range these scenes present.
Low-Contrast Scene
The histogram shows a narrow hump concentrated in the middle with nothing at either edge. This is common in fog, overcast light, or flat lighting conditions. The image may benefit from a contrast boost in post-processing.
Understanding Clipping
Clipping occurs when pixel values hit the absolute minimum (0, pure black) or maximum (255, pure white). Clipped areas contain no recoverable detail. No amount of post-processing can bring back information that was never captured.
Highlight Clipping
When the histogram data hits the right wall and appears to climb up it, highlights are clipping. Blown-out skies, white clothing with no texture, and specular reflections on water are common victims.
Highlight clipping is generally more damaging than shadow clipping because blown-out white areas are visually distracting and cannot be recovered, even from RAW files.
Shadow Clipping
When the histogram data hits the left wall, shadows are clipping to pure black. While deep black shadows can be acceptable or even desirable in some images, excessive shadow clipping means lost detail in dark areas.
RAW files have more shadow recovery headroom than highlight recovery. For a full comparison of the benefits, see our article on RAW vs JPEG and when to use each. You can typically pull shadows up by 2 to 3 stops in a RAW processor before noise becomes objectionable, but you can only recover about 1 to 1.5 stops of blown highlights.
Clipping Warnings (Blinkies)
Most cameras offer a highlight clipping warning that flashes or blinks the overexposed areas during image review. Photographers call these “blinkies.” Enable them in your playback menu. They give you an instant visual indication of where you are losing highlight detail.
Small specular highlights (like sun reflecting off chrome or water) will always clip, and that is fine. Worry about clipping in large important areas like skies, skin, and white fabric.
Expose to the Right (ETTR)
Expose to the right is a technique where you deliberately push your exposure as bright as possible without clipping important highlights. The histogram data should reach the right edge but not slam into it.
Why ETTR Works
Digital sensors capture more tonal information in the brighter stops than the darker stops. The amount of data a sensor records varies by size — our guide on camera sensor sizes explained covers how full-frame, APS-C, and Micro Four Thirds sensors differ in dynamic range. The brightest stop of your image contains roughly half of all the data the sensor records. By placing your exposure as far right as possible, you maximize the signal-to-noise ratio, resulting in cleaner files with less shadow noise.
How to Apply ETTR
- Take your initial shot.
- Check the histogram.
- If there is a gap between the data and the right edge, increase exposure (use exposure compensation in aperture or shutter priority).
- Keep adding exposure until the histogram data just touches the right edge without clipping.
- In post-processing, bring the exposure back down to your desired brightness.
When Not to Use ETTR
- Fast-paced shooting like sports or street photography where you cannot check each histogram. Similarly, shooting in low light without flash often demands quick exposure decisions where ETTR is impractical.
- Scenes with specular highlights that will clip regardless of exposure.
- JPEG shooters who cannot recover highlights as effectively as RAW shooters.
- Video, where overexposure is harder to correct in post.
RGB Histograms
Beyond the standard luminance histogram, most cameras also display individual histograms for the red, green, and blue channels.
RGB histograms are valuable because a color channel can clip even when the luminance histogram looks fine. A bright red sunset might clip the red channel while the overall histogram appears normal. Skin tones under warm lighting can clip the red channel first.
Check the RGB histogram when shooting scenes with saturated colors: sunsets, neon lights, vivid flowers, or any scene dominated by a single strong color.
Practical Histogram Workflow
Here is how to integrate the histogram into your shooting routine:
- Take a test shot of the scene.
- Check the histogram immediately. Do not judge exposure by the LCD image.
- Look for clipping on both ends. Enable blinkies for a quick check.
- Adjust exposure if needed. Increase for underexposure, decrease for overexposure.
- Re-shoot and re-check. Confirm the adjustment worked.
- Monitor as light changes. Recheck the histogram every few minutes during golden hour or changing weather.
This cycle becomes second nature quickly. After a few weeks of actively using the histogram, you will find yourself nailing exposure on the first or second shot rather than guessing and hoping.
Recommended Camera Settings for Histogram Practice
If you are learning to read histograms, try these controlled exercises to see how settings affect the histogram in real time:
| Scenario | Aperture | Shutter Speed | ISO | Expected Histogram |
|---|---|---|---|---|
| Bright outdoor scene | f/8 | 1/500s | 100 | Spread across full range |
| Overexposed test | f/4 | 1/125s | 400 | Data pushed hard right, highlight clipping |
| Underexposed test | f/11 | 1/1000s | 100 | Data bunched left, gap on right |
| High-contrast backlit scene | f/8 | 1/250s | 100 | Bimodal peaks at both edges |
| Low-contrast foggy morning | f/8 | 1/250s | 200 | Narrow hump in the center |
| ETTR landscape | f/11 | 1/60s | 100 | Data touching right edge without clipping |
On cameras like the Nikon Z6 III or Sony A7 IV, you can display a live histogram in the electronic viewfinder while adjusting these settings, making it easy to see the graph shift in real time as you change exposure. Canon R6 Mark II users should enable the histogram under “Shooting info. disp.” in the menu system.
Real-World Histogram Tips from Experienced Photographers
Shoot a gray card first. Before a critical shoot, photograph an 18% gray card filling the frame. The histogram should show a single spike in the center. If it is shifted left or right, your metering needs calibration or compensation. This is especially useful when shooting product photography under controlled lighting.
Use the histogram to judge flash exposure. After a flash shot, check the histogram immediately. Flash exposure that looks correct on the LCD might reveal clipped highlights on the histogram, particularly on skin tones where the flash created hot spots. On cameras like the Sony A7R V with its 61-megapixel sensor, even small blown highlights are noticeable at full resolution.
Bracketing with histogram confirmation. When shooting high dynamic range scenes like real estate interiors with bright windows, take three bracketed exposures and check the histogram of each. The darkest exposure should show no right-edge clipping (preserving window detail), and the brightest should show no left-edge clipping (preserving shadow detail). This technique is standard practice among architectural photographers using cameras like the Canon EOS R5 or Nikon Z8.
Watch for channel-specific clipping in golden hour light. During sunset shoots, the overall luminance histogram may look fine while the red channel is completely blown. Photographers shooting landscapes with the Fujifilm GFX 100S or similar high-resolution cameras often switch to the RGB histogram view during golden hour to catch red channel clipping before it destroys color detail in the sky.
Histogram Myths
“A perfect histogram is a bell curve.” False. The histogram shape should match the scene. A dark moody image should be left-weighted. A bright high-key portrait should be right-weighted. There is no single “correct” shape.
“The histogram should never touch the edges.” False. Deep blacks and bright whites are part of many photographs. The concern is whether important detail is being lost in those clipped areas.
“Histograms are only useful for landscapes.” False. Portrait, product, event, and street photographers all benefit from histogram awareness. Any situation where accurate exposure matters benefits from this tool.
The histogram removes guesswork from exposure. It is objective, reliable, and available on every digital camera made in the last two decades. Combining histogram awareness with manual mode on your camera gives you complete creative control over every shot. Use it consistently and your keeper rate will increase immediately.
Frequently Asked Questions
How do I read a histogram on my camera? The histogram is a graph displayed during image playback or in live view. The left side represents shadows (dark tones), the center represents midtones, and the right side represents highlights (bright tones). If the data is bunched to the left, your image is underexposed. If it is bunched to the right with data climbing the right wall, your highlights are clipping and detail is lost. A well-exposed image typically shows data spread across the full range without slamming into either edge. Enable the histogram in your camera’s playback display settings and check it after every shot until reading it becomes second nature.
Should the histogram always be centered like a bell curve? No. A centered bell curve is not the goal. The histogram shape should reflect the scene you are photographing. A dark, moody low-key portrait will naturally have data concentrated on the left side. A bright high-key portrait of a subject in white clothing against a white background will have data concentrated on the right. A snowy landscape will be heavily right-weighted. The key is to ensure you are not losing important detail to clipping at either edge, not to force the data into any particular shape.
What is the difference between a luminance histogram and an RGB histogram? The luminance histogram shows the overall brightness distribution of your image as a single graph. The RGB histogram shows separate graphs for the red, green, and blue channels. The RGB version is important because individual color channels can clip even when the luminance histogram looks fine. This commonly happens with saturated reds at sunset, vivid blue skies, or warm-toned skin under tungsten lighting. If your camera offers both views, use the RGB histogram when shooting scenes with strong, saturated colors.
You might also like
How to Use Manual Mode on Your Camera
Understand manual mode with clear explanations of aperture, shutter speed, and ISO, plus practice exercises to build confidence.
How to Shoot Silhouettes: A Step-by-Step Guide
Master silhouette photography with backlighting techniques, exposure metering tips, subject selection, and creative composition ideas.
How to Photograph Sunsets Like a Pro
Capture stunning sunset photos with the right exposure settings, silhouette techniques, graduated filters, and HDR methods.