How to Clean Your Camera Sensor Safely
Dust spots ruining your photos? Learn how to clean your camera sensor at home with our step-by-step guide and recommended tools.
If you change lenses — and you should, because that’s the whole point of interchangeable-lens cameras — dust will eventually land on your sensor. Those tiny specks show up as dark spots in your images, especially visible in blue skies and at narrow apertures like f/11 or f/16.
The good news: cleaning your sensor is straightforward once you know the technique.
How to Check for Sensor Dust
Before cleaning, confirm you actually have a dust problem:
- Set your camera to Aperture Priority
- Choose the narrowest aperture (f/16 or f/22)
- Point at a plain white wall or bright sky
- Slightly defocus the lens
- Take a photo and examine it at 100% zoom
Dark spots that appear in the same position across multiple images? That’s sensor dust.
Level 1: Air Blowing (Safest)
This removes loose dust without touching the sensor.
What you need:
- A rocket-style air blower (Giottos Rocket, VisibleDust Zeeion)
- A clean, low-dust environment
Steps:
- Charge your battery fully (the sensor cleaning mode holds the mirror/shutter open using battery power)
- Enter sensor cleaning mode in your camera menu
- Point the camera down so dust falls away from the sensor
- Use the blower to gently puff air onto the sensor surface
- Do NOT use compressed air cans — they can spray propellant onto the sensor
Success rate: Removes about 70% of dust particles. If spots remain, move to Level 2.
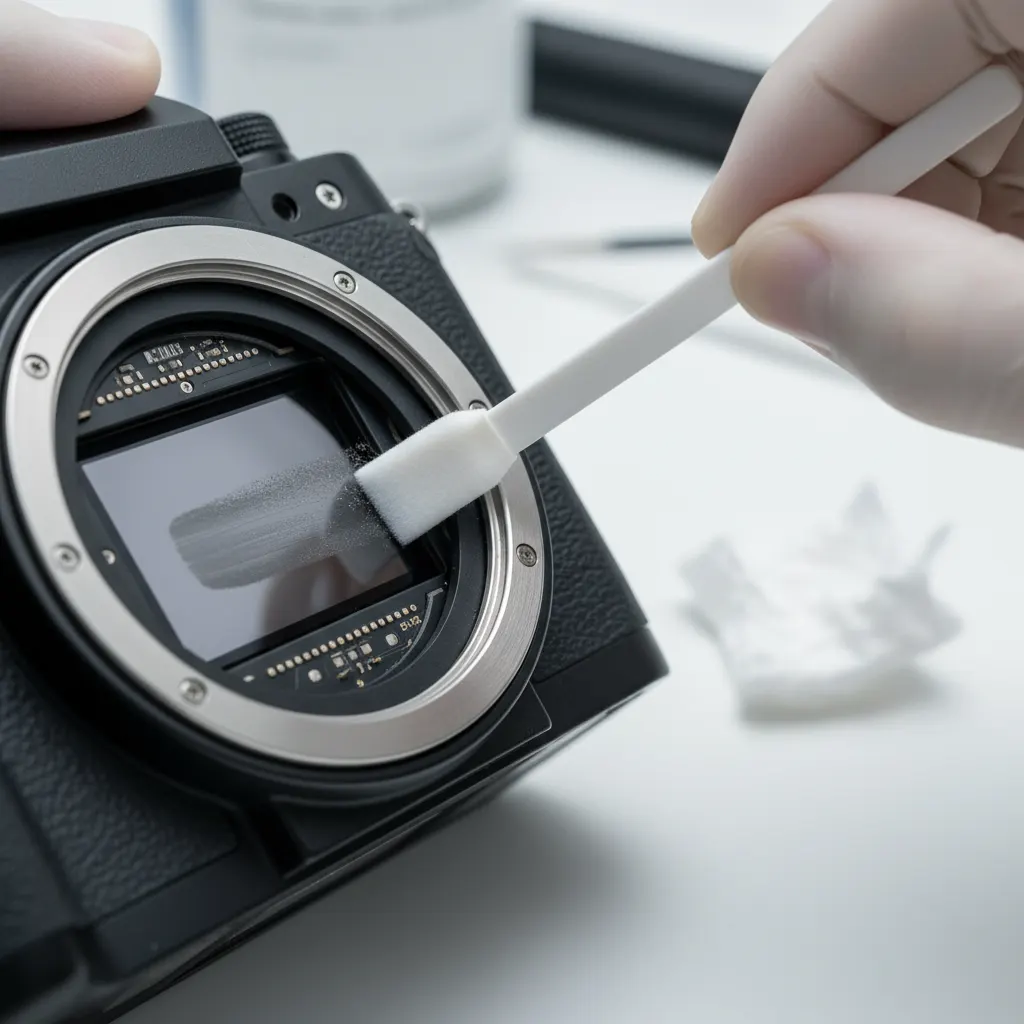
Level 2: Wet Cleaning (Most Effective)
For stubborn dust and smudges, wet cleaning with sensor swabs is the gold standard.
What you need:
- Sensor cleaning swabs sized for your sensor — make sure you know your camera sensor size so you buy the correct swab width (APS-C or full-frame)
- Sensor cleaning solution (Eclipse, VisibleDust Sensor Clean)
- A clean workspace with good lighting
Recommended kits:
- VisibleDust EZ Sensor Cleaning Kit — the industry standard
- VSGO Sensor Cleaning Kit — excellent budget option
- Photographic Solutions Sensor Swab Ultra — single swabs with pre-applied solution
Steps:
- Enter sensor cleaning mode
- Apply 2-3 drops of cleaning solution to one side of the swab
- In one smooth motion, drag the swab across the sensor from left to right
- Flip the swab to the dry side
- Drag back across the sensor from right to left
- Use each swab once only — never reuse
- Check your results with another test shot
Important: Apply light, even pressure. You’re not scrubbing — you’re gliding. The sensor has a thin glass filter on top; it’s more durable than you think, but aggressive pressure is unnecessary.
Level 3: Professional Cleaning
If you’re not comfortable cleaning the sensor yourself, or if the contamination is severe (oil spots, stubborn residue), take it to a professional service center. Most camera shops offer sensor cleaning for $30-75.
Manufacturer service centers (Sony, Canon, Nikon) are the safest option for warranty-covered cameras.
Prevention Tips
Minimize dust exposure in the first place:
- Change lenses quickly — have the replacement lens ready before removing the current one
- Point the camera down when changing lenses so dust falls away from the sensor
- Keep a body cap on whenever no lens is attached
- Store cameras in sealed bags when not in use, especially in dusty environments
- Use the built-in sensor cleaning — most cameras have an ultrasonic sensor cleaning feature that shakes off loose particles on startup/shutdown
- Clean your lens rear elements — dust on the back of your lens can migrate to the sensor
How Often Should You Clean?
That depends on how often you change lenses and where you shoot:
- Studio/indoor photographers: Every 3-6 months
- Outdoor/travel photographers: Monthly or when spots appear
- Dusty/sandy environments: After every session
Check for dust regularly by taking a test shot against a white surface. Prevention is always easier than cleaning.
Common Mistakes to Avoid
- Using compressed air — propellant residue is worse than dust
- Blowing with your mouth — moisture droplets are impossible to remove
- Using tissues or cotton swabs — they leave fibers behind
- Cleaning with a low battery — if the camera loses power during cleaning mode, the shutter can close on your swab
- Reusing swabs — always use a fresh swab for each pass
Our Verdict
Sensor cleaning sounds intimidating, but it’s a basic maintenance skill that every camera owner should learn. Start with the air blower method — it’s risk-free and solves most dust problems. Graduate to wet cleaning when you’re comfortable.
Keep your sensor clean, and your photos stay sharp. It’s that simple. While you’re maintaining your gear, it’s also worth checking whether your camera firmware is up to date — firmware updates can improve built-in sensor cleaning functions and overall camera reliability.
You might also like

Best Cameras for Video and Content Creation in 2026
YouTube, TikTok, or client work — we review the best cameras for video content creators at every level and budget.

Best Cameras Under $500 in 2026
You don't need to spend a fortune to take great photos. Here are the best cameras under $500 for every type of photographer.

Best Mirrorless Cameras for Beginners in 2026
Our top picks for beginner-friendly mirrorless cameras. Affordable, easy to use, and packed with features to help you learn photography fast.